- Home
-
Ultimate Knife Kit
- Vendor Registration
- 1. Blade Steels and Damascus Billets
- Custom Made Damascus Blades and Blanks and Fittings
- HGR - Hardened, Ground, Ready to Use Damascus Blades
- FB - Forged to Shape Damascus Blanks
- FBF - Forged Blanks for Folding Knives
- AF - As Forged or Rough Blank
- Forged Fittings
- 2. Handle Materials
- 3. Exotic Metals
- 4. Custom Services and Embelishments
- Centercross keychains
- Hand Stamps for Logos by Buckeye Engraving
- Photography by Douglas Brown Photography
- Books
- Vendor Links
- U.K.K. Contact
- Classifieds
- News
- How Can a Cross?
- Education/Tutorials
- Contact
Table of Contents
- General Terms
- Handle Materials
- Blade Steels
- Properties of Performance Steels
- Blade Shapes
- Locking Mechanisms & Types
- Blade Grinds
- Metal Composition
- Marking Your Knives by Ed Caffery
- Heat Treating / Allotropy by Gene Osborn
- Making Bronze Cable Damascus by Gene Osborn
- How to Build an Anvil Mounting Stand by Bob Warner
- How to Build a Coal Forge by Bob Warner
- How to Build a 9" Disc Sander and Stand by Bob Warner
- Tips and Tricks by Bob Warner
- How to Build a Propane Forge and Burner by Bob Warner
- How to Build a Forging Stand by Bob Warner
- Knife Making 101 by Bob Warner
- Knife Making Frequently Asked Questions by Bob Warner
- Etching Damascus by Gene Osborn
- How to Build a Post Vise Stand by Bob Warner
- Useful Links by Bob Warner
1. General Terms
- Anodization - Is an electrochemical process which adds color to titanium, which is especially conducive to this coloring process. Depending on the voltage used, colors can vary.
- Back - The back of the blade is the opposite side of the cutting edge.
- Bead Blasting - A process by which steel, aluminum, and titanium are finished. It provides a 100% subdued non-glare finish.
- Belly - The belly is the curved part of the blade edge.
- Bevel - The bevel is the sloping area that falls from the spine towards the edge and false edge of the blade.
- Blade Spine - This is the thickest part of a blade. On a single-edge, the blade spine would be at the back of the blade. For double-edged blades, the blade spine would be right down the middle.
- Butt Cap - A metal cap fitted over the pommel is referred to as a butt cap.
- Choil - The choil is the unsharpened part of the blade. It is left at full thickness like the blade spine and is found where the blade becomes part of the handle. Sometimes the choil will be shaped to fit the index finger.
- Crink - A crink is a bend at the beginning of the tang that keeps multi-bladed pocket knives from rubbing against each other.
- Cryogenic Quenching - Is a progress of freezing a knife blade below zero degrees Fahrenheit which improves knife strength and performance on many blade steels.
- Edge - This is the sharpened side of the blade. Blades can have either a single or double edge depending on the design.
- Escutcheon - this is a small pin or piece of metal attached to the handle for engraving, branding, or just decoration and is generally inlayed.
- False Edge - Widely used on military and combat fighting knives, a false edge blade is an additional bevel on the back of the blade enhancing the blade's point.
- Game Hook - Is also known as a gut hook. This knife blade shape is best utilized for opening the flesh of game.
- Guard - The guard is a separate piece of metal attached between the blade and the top of the handle to protect hands from the edge during cutting.
- Hilt -Where the blade meets the guard or handle.
- Kick - The kick is found on a pocket knife and is the projection on the front edge of the tang, the blade rests here in the closed position and keep the front part the edge from hitting the spring.
- Lanyard Hole - This is a hole to fit a lanyard, rope or carrying implement through.
- Lashing Grommets - These terms refer to notches that are designed into the back lower part of the blade for better thumb control.
- Mark Side - On a pocket knife, the mark side is the side of the blade with the nail mark.
- Nail Mark/Nail Nick - On a pocket knife blade the nail mark is a groove cut into the blade so that it can be opened using your fingernail. Many pocket knives use this method of opening the blade.
- Point - The tip of the blade. For more information see Blade Shapes.
- Pocket Blade - This is the largest blade on a multi-bladed knife.
- Pen Blade - The pen blade is the smallest blade on a multi-bladed knife.
- Pommel/Butt - Also known as the knife butt. Many butts and pommels are designed for hammering and bone crushing. Other butts and pommels are decorative and can contain a lanyard hole. Some knife pommels and butts are designed to be removable so additional items can be stored in the knife handle.
- Powered Metal - A procedure used to shape metal pieces. Metal particles are molded under pressure and then fused under high heat. Powered metal is also known as sintered metal.
- Quillion - The quillion is the area of the guard that extends past the section surrounding the tang and is the most protective part of the guard.
- (HRC) Rockwell Hardness - The industry scale used for measuring the hardness of blade steel. The higher the reading means the harder the steel.
- Ricasso - The ricasso is the flat section of the blade between the guard and the start of the bevel. This is where you will most often find the tang stamp.
- Scales - The scales are pieces that are attached to a full tang to form the handle.
- Scrimshaw - Scrimshaw is the art of etching decorative designs into ivory or simulated ivory handles.
- Swedge - Is the bevel on the back of the blade.
- Serrated Edge - Serrations are a set of "teeth" or notches on the back or front of the blade to aid in cutting.
- Swedge - A swedge is a bevel on the back of the blades.
- Tang-Stamp - This is an imprinting that can show style number, collector's number, manufacturer's name.
- Tang - Extension of the blade that runs through or between the handle of a knife.
- Full Length Tang - Extension of the blade steel that runs completely through the handle to the end of the knife.
- Full Tang - A tang that shows all around the knife handle between two pieces of the handle material.
- Trailing Point - The trailing point blades point is higher than the spine of the knife.
2. Handle Materials
- Stag -Can come from either naturally shed deer antlers or ones taken from legal hunts. When exposed to open flame, stag takes on that slightly burnt look.
- Bone - Comes from deceased animals. Bone is usually given a surface texture. This is the most common handle material for pocket knives.
- Mother of Pearl - Mother of pearl is the common name for iridescent nacre, a blend of minerals that are secreted by oysters and other mollusks and deposited inside their shells, coating and protecting their bodies from parasites and foreign objects.
- G-10 - A fiberglass based laminate. Layers of fiberglass cloth are soaked in resin and are compressed and baked. The resulting material is very hard, lightweight, and strong. Surface texture is added in the form of checkering.
- Ivory - A hard, smooth, yellowish-white substance composed primarily of dentin that forms the tusks of an elephant or mammoth.
- Mammoth Tooth - Pleistocene mammoth (Mammuthus primigenius) once widespread in the cold regions of the Northern Hemisphere.
- Stone - Concreted earthy or mineral matter, rock.
- Micarta - The most common form is linen micarta. The layers of linen cloths are soaked in a phoenolic resin. The end product is a material that is lightweight and strong. Micarta is extremely smooth to the touch. Micarta is a relatively soft material that can be scratched if not treated properly.
- Carbon Fiber - Composed of thin strands of carbon, tightly woven in a weave pattern that is set in resin. It is an extremely strong and lightweight synthetic material knife handle.
- Titanium - A nonferrous metal alloy, the most common form of titanium is 6AL/4V: 6% aluminum, 4% vanadium, and 90% pure titanium. Aside from handles, titanium is also used as liner materials for linerlock knives.
- Aluminum - Just like titanium, aluminum is also a nonferrous metal. Commonly used as handles, aluminum gives the knife a solid feel, without the extra weight. The most common form of aluminum is T6-6061, a heat treatable grade. The most common finishing process for aluminum is anodizing.
3. Blade Steels
- ATS-34 - premium grade of stainless steel used by most custom knife makers and upper echelon factory knives. It is also common with the making of quality tactical folding knives or production collectible pocket knives. It is Japanese steel, owned by Hitachi Steels. The American made equivalent of ATS-34 is 154CM. - Typical Chemistry: C 1.00 Mn .40 Si .25 Cr 13.75 Mo 3.5
- A2 - Is an Excellent air-hardening tool steel, it is tougher than D2 and M2, with less wear resistance. As an air-hardening steel, don't expect it to be differentially tempered. Its good toughness makes it a frequent choice for combat knives. Typical Chemistry: C 0.95-1.05 Cr 4.75-5.50 Cu 0.25 Mn 0.60-1.00 Mo 0.90-1.40 Ni 0.30 P 0.03 S 0.30 Si 0.30-0.50 V 0.20-0.25
- S30V - Revolutionary S30V steel blades are harder, more wear resistant and far less brittle than any standard 440C series stainless steel blade. Tests also show 45% better edge retention than 440C stainless. - Typical Chemistry: C 1.45 Mn .40 Si .40 Cr 14.00 Va 4.00 Mo 2.00
- Titanium - Unlike stainless steel knives, titanium knives are almost completely rustproof and corrosion resistant because they contain no carbon and is non-magnetic. The result is a knife that will hold an edge for a very long time. Titanium steel knives require almost no sharpening or maintenance. Newer titanium alloys can be hardened near 50 Rc, and at that hardness seems to take something approaching a useful edge. Popular as expensive dive knives these days, because the SEALs use it as their knife when working around magnetic-detonated mines.
- D2 Steel - Is a high carbon, high-chrome tool steel. Knives produced with D2 steel have an excellent ability to keep an edge. Typical Chemistry: C 1.50 Mn .40 Si .40 Cr 12.00 Va .95 Mo .90
- O-1 steel - Is a general purpose oil-hardening tool and die steel. Normal care in heat treatment gives Good results in hardening and produces small dimensional changes. O1 has good abrasion resistance and has sufficient toughness for a wide variety of tool and die applications and makes very good knives. Typical chemistry: C 0.90 Mn 1.20 V 0.20 W 0.50 Cr 0.50.
- 440C Stainless - Grade 440C is capable of attaining, after heat treatment, the highest strength, hardness and wear resistance of all the stainless alloys. It's very high carbon content is responsible for these characteristics, which make 440C particularly suited for knives. Typical Chemistry: C 1.00 Mn .45 Si .30 Cr 17.00 Mo .50
- 52100 - A high-carbon chromium alloy steel, which, because of its versatility, is used in a variety of mechanical applications. In the annealed condition this steel is comparatively easy to machine, yet very high hardness and abrasion resistance can be developed by heat treatment to make the steel particularly suitable for applications requiring extreme wear resistance such as knives. In addition, 52100 alloy steel can be heat treated to high levels of tensile strength and fatigue strength. Typical Chemistry: C 1.02 Mn .36 Si .25 Cr 1.46
- 5160 - A steel popular with forgers, it is popular now for a variety of knife styles, but usually bigger blades that need more toughness. It is essentially a simple spring steel with chromium added for hardenability. It has good wear resistance, but is known especially for its outstanding toughness. This steel performs well over a wide range of hardness's, showing great toughness when hardened in the low 50s Rc for swords, and hardened up near the 60s for knives needing more edge holding. Typical Chemistry: C 0.56-0.64 Cr 0.70-0.90 Mn 0.75-1.00 P 0.04 S 0.04 Si 0.15-0.30
- 154 CM - Is an American made premium grade stainless steel originally developed for tough industrial applications. Known for its best all-around qualities, it offers great corrosion resistance with good toughness and edge quality. Typical Chemistry: C 1.05 Mn .50 Si .30 Cr 14.00 Mo 4.00
- 15 N 20 - The heat treatable silver stripe in common Damascus. Is a high nickel content carbon steel. It is common used in sawmill band saw blades, but not always. It combines well with carbon steel for a highly reflective, high contrast billet. It is known as tough steel and adding it to the billet will only enhance the performance. It is the Swedish version of L6. Typical Chemistry: C 0.75 Mn 0.75 Si 0.25 Ni 1.5
- L-6 - A band saw steel that is very tough and holds an edge well, but rusts easily. It is a, like O1, very forgiving steel for the forger. If you're willing to put up with the maintenance, this may be one of the very best steels available for cutlery, especially where toughness is desired. Typical Chemistry: C 0.65-.75 Cr 0.06-1.20 Cu 0.25 Mn 0.25-0.80 Mo 0.50 Ni 1.25-2.00 P 0.30 S 0.30 S 0.03 Si 0.50 V0.20-0.30
- 1095 - This is a high carbon alloy of the plain carbon steel family. It is intended for high hardness and strength, but also tends to be brittle. Typically used for springs or cutting tools requiring sharp cutting edges such as grass or grain cutting tools. Machinability is relatively poor for 1095 alloy. Typical Chemistry: C 0.9 - 1.03 M 0.3 - 0.5 P 0.04 S0.05
- Stellite 6K - is a non-steel cobalt alloy. It is a flexible material with very good wear resistance. It is practically corrosion resistant and is very expensive. Typical Chemistry: C 1.90 Mn 2.00 Cr 32.00 Ni 3.00 Mo 1.50 W 4.50 Co 64.00
- DAMASCUS - Is specially forged, layered steel made up of a variety of steels, it offers remarkable toughness and edge quality. For finishing, the surface layers or lines are exposed through an acid etch, which creates a very unique visual effect. It is used in special applications due to its inherent high cost and artistic nature.
4. Properties of Performance Steels
What is it you are looking for in a steel? What you want to look for is strength, toughness, wear resistance, and edge holding. And at times, you are also looking for stain resistance.
- Wear Resistance - Wear resistance is the ability to withstand abrasion. The amount, type, and distribution of carbides within the steel is what determines wear resistance.
- Strength - The ability to take a load without permanently deforming. For many types of jobs, strength is extremely important. Any time something hard is being cut, or there is lateral stress put on the edge, strength becomes a critical factor. In steels, strength is directly correlated with hardness - the harder the steel, the stronger it is.
- Toughness - The ability to take an impact without damage, Meaning chipping, cracking, etc. Toughness is obviously important in jobs such as chopping, but it's also important any time the blade hits harder impurities in a material being.
The Knifemaker will be making a tradeoff of strength versus toughness. Generally speaking, within the hardness range that the steel performs well at, as hardness increases, strength also increases, but toughness decreases. This is not always strictly true, but as a rule of thumb is generally accurate. In addition, it is possible for different heat treat formulas to leave the steel at the same hardness, but with properties such as toughness, wear resistance, and stain resistance significantly differing.
- Stain Resistance - The ability to withstand rust (oxidation). Obviously, this property can be helpful in corrosive environments, such as salt water. In addition, some types of materials are acidic, and micro-oxidation can lead to edge loss at the very tip of the edge, over a small amount of time. In "stainless" cutlery steels, stain resistance is most affected by free chromium - that is, chromium that is not tied up in carbides. So, the more chromium tied up in carbides, the less free chromium there is, which means more wear resistance but less stain resistance.
- Edge Holding - The ability of a blade to hold an edge. Many people make the mistake of thinking wear resistance and edge holding are the same thing. Most assuredly, it is not. Edge holding is job-specific. That is, edge holding is a function of wear resistance, strength, and toughness. But different jobs require different properties for edge holding. For example, cutting through cardboard, toughness becomes extremely important, because micro-chipping is often the reason for edge degradation. Whittling very hard wood, strength becomes very important for edge-holding, because the primary reason for edge degradation is edge rolling and impaction. Wear resistance becomes more important for edge holding when very abrasive materials, such as carpet, are being cut. And for many jobs, where corrosion- inducing materials are, corrosion can affect the edge quickly, so corrosion resistance has a role to play as well.
There are other properties that significantly affect how steel performs:
- Ability to take an edge - Some steels just seem to take a much sharper edge than other steels, even if sharpened the exact same way. Finer-grained steels just seem to get scary sharp much more easily than coarse-grained steels, and this can definitely affect performance. Adding a bit of vanadium is an easy way to get fine-grained steels. In addition, an objective of the forging process is to end up with finer-grained steel. So both steel choice, and the way that steel is handled, can affect cutting performance.
- Manufacturing Process - Cleaner, purer steels perform better than dirtier, impure steels. The cleaner steel will often be stronger and tougher, having less inclusions. High quality processes used to manufacture performance steel include the Argon/Oxygen/Decarburization (AOD) process, and for even purer steel, the Vacuum Induction Melting/Vacuum Arc Re-melting (VIM/VAR) process, often referred to as "double vacuum melting or vacuum re-melting."
- Edge Toothiness - Some steels seem to cut aggressively even when razor polished. For these steels, even when they're polished for push-cutting, their carbides form a kind of "micro serrations" and slice aggressively.
5. Blade Shapes
- Clip Point - A clip point blade has a concave or straight cut-out at the tip (The "clip"). This brings the blade point lower for extra control and enhances the sharpness of the tip. You will often find a false edge with the clip point. These types of blades also often have an abundant belly for better slicing capabilities.
- Dagger/Double Edge - A double edge blade is sharpened on both sides ending with the point aligned with the spine, in the middle of the blade.
- Drop Point - The drop-point blade has lowered tip via a convex arc. This lowers the point for extra control and also leaves the strength. This type of blade also has a good-sized belly for better slicing.
- Drop Forged - Also called closed die forging. The form of the finished item is built into the die, the steel is heated and the hammer forms the plastic steel into recesses of the die.
- Hook Blade - The edge of a hook blade curves in a concave manner.
- Scimitar - This is a curved blade with the edge on the convex side.
- Sheepsfoot - The spine of this blade curves downward to meet the edge. This leaves virtually no point. This type of blade typically has little or virtually no belly and is used mainly for slicing applications.
- Spear Point - The point of this blade is exactly in the center of the blade and both edges are sharpened. The point drops all the way down the center of the blade.
- Tanto - The point to this style blade is in line with the spine of the blade. This leaves the point thick and strong. There are quite a few different variations of how tanto blades are designed. The way the front edge meets the bottom edge, whether at an obtuse angle or a curve is one difference. You will also find differences in the point being clipped or not and whether there is a chisel grind.
- Trailing Point - The trailing point blade's point is higher than the spine. This is typically engineered with an extended belly for slicing, with the point up and out of the way.
6. Locking Mechanisms & Types
- Axis Lock - The features of the AXIS lock are significant and greatly enhance the function of knives. First and foremost is the strength. This lock is definitely more than adequate for the demands of normal knife use. A close second to strength is the inherent AXIS advantage of being totally ambidextrous without user compromise. The blade can be readily actuated open or closed with either hand- without ever having to place flesh in the blade path. Lastly, and certainly not any less impressive, is the indescribable "smoothness" with which the mechanism and blade function. By design there are no traditional "friction" parts to the AXIS mechanism, making the action the much smoother. And it's all reasonably exposed so you can easily clean away any unwarranted debris. Basically, AXIS gets its function from a spring-loaded bar that rides forward and back in a slot machined into both liners. The bar extends to both sides of the knife; spanning the space between the liners and is positioned over the rear of the blade. It engages a ramped notch cut into the tang portion of the knife blade when it is opened. Two omega style springs, one on each liner, give the locking bar its inertia to engage the knife tang, and as a result the tang is wedged solidly between a sizable stop pin and the AXIS bar itself. It's a lot of words in an attempt to describe simplicity, but the very best way to truly appreciate the AXIS lock is to experience it for yourself firsthand. There are several models to choose from with more on the way.
- Block Lock - This folder lock has a spring loaded block located on the center pin. The block extends into a hole in the tang to lock the blade open.
- Clasp - This style folding knife has no lock or backspring.
- Lockback - This style of lock has a spring-loaded locking bar with a tooth at the end. The tooth falls into the notch cut into the blade tang and is held there under the spring tension. A cut out in the handle spine houses the release for the lock. These locks generally require 2 hands to unlock and close.
- Locking Liner/Side Lock - This particular locking system was refined by knife maker Michael Walker. The actual locking mechanism is incorporated in the liner of the handle, hence the name. If there is a metal sheet inside the handle material, it is called a liner. With a locking liner, opening the blade will allow this metal to flex over and butt against the base of the blade inside the handle, locking it open. Moving this liner aside will release this lock allowing the blade to close. Disengagement of the lock is performed with the thumb, allowing for one handed, hassle free action. Locking liners are commonly found on tactical folding knives, both production and custom.
- Ringlock - This design has been around since the 1890's. The Ringlock is similar to the Slipjoint, but it has a rotating slipspring instead of a backspring.
- Rolling Lock - This design uses a sort of bearing that rolls into the locked position.
- Sebenza Lock - The concept of this lock is comparable to the Liner Lock. A hollowed out section of the scale is fixed into the handle cavity to lock the blade open.
- Slipjoint - The slipjoint is one of the more common designs for folding and pocket knives. Instead of a lock, the slipjoint utilizes a backspring to create resistance to hold the blade open.
- Swinglock - There is one pivot pin and one locking pin used to design this style lock.
- Wood Lock - This lock was designed by Barry Wood. The handles and blade are attached to a central pin and pivot independently. A second pin is fixed into the inside of one scale and extends into slot in the tang to lock the blade open.
7. Blade Grinds
- Hollow Grind - The most common grind, found on the majority of custom and production pieces. Hollow ground blades have a thin edge that continues upwards, and is the grind is produced on both sides of the blade. Since the cutting edge is relatively thin, there is very little drag when cutting.
- Flat Grind - Flat grinds are characterized by the tapering of the blade from the spine down to the cutting edge. This style of grind is also referred to as a "V" grind, since the cross section of this grind resembles that letter. The chisel grind, a popular style for tactical blades, is a variation of the flat grind. On a chisel round blade, it is ground on one side, and on the other it is not. These blades are easier to sharpen, because you sharpen one side only.
- Concave Grind - Similar to the flat grind in that the blade tapers from the spine to the cutting edge, except the taper lines are arcs instead of straight lines.
- Convex Grind - Similar to the flat grind in that the blade tapers from the spine to the cutting edge, except the taper lines are arcs extending outward instead of inward as in the concave grind above or straight lines. If you picture a pumpkin seed, you will get a good idea of what the cross sectional view of this grind is like.
- Chisel - The chisel grind is ground on only one side of the blade. It's easy to produce and easy to sharpen. It is often ground at around 30 degrees which contributes to a thin and sharp edge.
- Sabre - The sabre grind has flat edge bevels that typically begin about the middle part of the blade and runs flatly to the edge. The edge is often left thick and thickens quickly past the edge. This is a great grind for chopping and other hard uses.
- Scandinavian Single-Bevel - the Scandinavian single-bevel grind looks similar to a sabre grind. The difference between the two grinds is that the Scandinavian single-bevel grind has no secondary edge bevels. This grind has an extremely thin and incredibly sharp edge.
- Clip Point - A clip point blade features a concave or straight cutout at the tip of the blade to bring the point lower for extra control and extra tip sharpness.
8. Metal Composition
- Carbon (C) - Increases edge retention and raises tensile strength. Increases hardness and improves resistance to wear and abrasion.
- Chromium (Cr) - Increases hardness, tensile strength and toughness- Provides resistance to wear and corrosion.
- Cobalt (Co) - Increases strength and hardness and permits quenching in higher temperatures - Intensifies the individual effects of other elements in more complex steels.
- Copper (Cu) - Increases corrosion resistance- Increases wear resistance.
- Manganese (Mn) - Increases hardenability, wear resistance and tensile strength - De-oxidizes and de-gasifies to remove oxygen from molten metal- In larger quantities, increases hardness and brittleness.
- Molybdenum (Mo) - Increases strength, hardness, hardenability, and toughness- Improves machinability and resistance to corrosion.
- Nickel (Ni) - Adds strength, hardness and corrosion resistance. Pure nickel is not heat treatable.
- Phosphorous (P) - Improves strength, machinability and hardness- Creates brittleness in high concentrations.
- Silicon (Si) - Increases yield strength- Increases tensile strength- De-oxidizes and de-gasifies to remove oxygen from molten metal.
- Sulphur (S) - Improves machinability when used in minute quantities.
- Tungsten (W) - Adds strength, toughness and hardness.
- Vanadium (V) - Increases strength, hardness and resistance to shock impact- Retards grain growth.
9. Marking your Knives by Ed Caffery
Many times I have received emails, or seen posts on forums from makers, asking suggestions about marking their blades. Many of these emails/ posts include an image of a logo, which the individual obviously put a great deal of time and effort in to creating. On the forums these questions receive a wide variety of answers, and in this article I will attempt to give you my advice, based on 26 years of making and selling knives.
OK, first of all, there are two ways to mark your knives. The choice is yours, but traditionally forged blades are stamped, and stock removal blades are etched.
Creating a mark with a stamp is very straight forward and with a bit of practice, is easily accomplished. The method involves nothing more than a "stamp" with the image/ letters you wish created in a mirror image on the end of the stamp. The marking can be done in a number of different ways that I will discuss later in the article.
Quality stamps are made of materials that are suited to the purpose, and if you intend to go this route, I would suggest ordering you stamp based on quality.... not price! I have the cheap stamps, and in one case the stamp only lasted for about 5 impressions before they started to mushroom out. My personal choice for quality stamp is Henry Evers corp. in Rhode Island. You can find him on the internet by searching "EverStamp".
The second method of marking your work is with electro-chemical etching. This system consists of an electronic device, a chemical electrolyte, and a stencil that contains a design/name that the individual chooses. While I have this option in my shop, I rarely use it, simply because I have never been able to achieve what I consider satisfactory results. I also find this method difficult for marking Damascus blades, which are a majority of what I produce, or purchased the equipment to create their own stencils.
Since I consider myself less than qualified to instruct on the chemical-etch method, I will concentrate on how one can accomplish marking their blades with the stamping method.
9.1. Choosing your mark
This is an area that requires a great deal of consideration and thought on the individual's part. For anyone but the most well known makers, I believe it is imperative that your mark contains information that will allow nearly anyone to look at one of you knives, and without any doubt, know who made it and more importantly, be able to find you. That means using your name, and not some obscure logo or initials. Many times over the years I have had individuals come to me with a knife that had some strange logo, initials, or a single first name on the blade, and ask me if I know who made the knife, because they would like another one. The fact of the matter is..... if the individual(s) can't find you, then they certainly can't order another knife from you. Your mark should contain at the very least, your last name, and if it's a common last name, I recommend both a first and last name. If you can get a city and state in there too, then that's all the better. I'm blessed in that I am the only "Caffrey" in the world that holds the Mastersmith rating. I mark my blades on one side of the ricasso with "Caffrey" and on the other side "MS" (Mastersmith). If there were another "Caffrey" I would simply put my first initial to my name. The point being that your mark must be easily understandable, and with minimal effort, anyone should be able to locate you from the mark on your knives.
9.2. Creating a stamp mark
Now that we've covered choosing a mark, let's talk about how to apply a stamped mark to your knives. Applying a mark via the stamping method can either be done while blade is cold, in its annealed state, or when the blade is hot. This gives me a deeper, more defined mark, which does not grind out when I am finishing a blade.
Once I have rough ground a blade, and its prepped for hardening, I prepare by ensuring that my stamp and stamping fixture is handy( you can also use a pair of slip joint pliers, with the stamp in the jaws and the handles wired tightly to hold the stamp). Recently I built a fixture that holds both my "Caffrey" stamp, and my "MS" stamp. I place this fixture on the anvil that sits next to my quench tank, and get everything else ready. I always do three normalizing heats on a blade just prior to quenching, and on the third normalizing heats, but whatever type of heat you utilize, the procedure is basically the same.
Once the heat required is achieved, the blade is quickly placed in the fixture, and one blow, with a hand held hammer is applied to the stamp, creating the impression in the ricasso. The fixture that I use insures that the stamp is level and at a 90degrees to the face of the ricasso, so that the impression is even, and NOT tilted one way or the other.
If you're using pliers or vice-grips to hold the stamp, you will have to ensure that the stamp is placed square and flat on the ricasso to ensure a good/clean mark. As with anything in knifemaking, it will require a little practice on your part, and at first you might wreck a blade or two, however, this is my preferred method.
I have also tried marking my blades with the stamp method, using a homemade press, while the blade is in the annealed state. My feeling is that this method puts undo wear and tear on the stamp (which I paid 100$+ for), and I have also destroyed a couple of blades when I pressed just a bit too hard, and literally cracked the ricasso from one edge of the mark to the plunge cuts!
After the stamp/mark is applied, I complete the heat treatment of the blade, and finish it out as usual. I now have a knife that is readily identifiable as my own, and with the information I applied with the stamp(s), anyone can locate me with minimal effort.
In conclusion, it really doesn't matter what method you use to mark your blade, The rules to follow are:
1.It must look good/professional
2.It must be easy to recognize
3.It must identify the knife as uniquely yours
4.It must allow anyone to find you with minimal effort
Once you decide to mark anything you make you've made a decision to proclaim it's excellence, Take the time, thought, and care to make sure the mark you place on your work reflects those points I've indicated!
10. Heat treating/Allotropy by Gene Osborn
The allotropic transformation is the molecular structure being altered by controlling the cooling rate of a given metal according to the chemistry requirements of the alloying elements utilized in the making of that steel. There are 5 groups of metals and 5 separate time, temperature, and transformation maps that decipher the cooling effects at any given point in time for that particular metal.
The most common map is for carbon and carbon based tool steels and measures the ferrite/carbon ratio at various temperatures including the critical and upper critical transformation zones where the austenite is turned into marstensite and so forth.
By measuring the carbon content and temperature/time rates, we can predict and prove specified hardness by controlling the cooling rates at which the steel cools, by controlling the molecular grain size and growth rate.
Annealing means to make the steel soft and to anneal you heat the steel to the critical zone and cool it slowly as if an oven cooling overnight. This allows you to work the steel in its softest state for shaping.
Hardening means to make it glasslike and a quench from the critical zone temperature causes the grains to freeze in tiny crystals forming a very brittle but hard mixture thru the steel. A temper is needed to relax the steel and make it more forgivable. A knife blade left hard is more likely to chip or snap the tip off, plus it is hard to sharpen. I believe that all steels should be fully hardened and not just on cutting edge, then tempered to the desired hardness. Hardening the whole blade maximizes the steel alloys and offers better corrosion resistance to the steel, and illuminates hard and soft spots in your blade.
Tempering is stress reliving, and is very important to the function of any blade. How long and at what temperature governs the overall effect of how it will perform. Most tool steels temper around 350 for an hour, and then repeat. Depending on the steel used, the hardness values range from 58 Rockwell C scale to 60 plus on the Rockwell C scale. The harder the steel, the harder it is to sharpen, but the longer the edge lasts, the softer blades sharpen quickly, but dull out the same time. You can determine the hardness you need ahead of time and consistently duplicate the process on once you have it worked out.
I don't recommend case hardening as it is only surface deep. Fully harden each blade, and temper to desired hardness.
Stainless steels are very different and require exact temperature controls and cooling rates. This is not recommended at home unless you have furnace with excellent temperature control that is repeatable.
Allotropy can be visualized by watching an egg cook in a skillet, as you watch it turn from liquid into a solid do to heat, except in heat treating, you ought to be able to turn that egg back to a liquid by reversing the process that makes it a solid.
You don't need to know that each molecule transforms from a 9 body centered cubit into a 14 face centered as the lattice structure begins to form grains as the steel cools, you simply need to know how to control it by time, temperature, and carbon content.
Each process has a purpose and procedure to allow the craftsman to maximize his/her efforts into making the finest tool and and/or artwork possible.
Heat treat guides are found in machinist's handbooks ad cover the whole spectrum of steels and metals. All formulas are based on the thickness of the steel being heat treated and read as inch thickness, which means per inch of thickness of steel you and more time.
Scale is a byproduct of a proper heat treat. Scale is formed as a piece of steel cools from the critical zone. The rate of cooling determines how much scale is formed, and this must be removed before going on with construction of the blade.
When scale pops off after the quench it should mean a successful hardening, if there was no scale pop off, you probably did not get up to the proper temperature before quenching. Scale popping off means the austenite has turned into martensite for the complete transformation. Clean the blade before tempering.
Color temping is not recommended for knife blades because most temperatures that generate pleasing colors are above the temper rates of most steel and you lose blade quality for color. A blade that is to soft is a good working tool. Fittings and guards can be colored by temperature for an aesthetic contrast of color. 360' turns gold, 370 turns red and purple, 385 turns blue and so forth, even though ovens vary slightly. Make your own color map by temperature and experimentation.
11. Making Bronze Cable Damascus by Gene Osborn
I have been reluctant in the past to share too much information on the subject strictly because of how sick the process can make you. Anytime you melt brass (or anything with zinc) you run the risk of poisoning yourself by fume inhalation. I can not emphasize enough how much precaution is needed to play with this stuff.
DO NOT IGNORE THIS WARNING, BRASS FUMES CAN KILL YOU!!
These fumes are caused by the heating of metal. As the metal turns liquid, the dezincification (fumes) drastically decreases. For this reason, I made a special furnace that simply keeps a pot of brass liquid, thus working with virtually no fumes as the brass is already liquid.
Step 1: Clean the cable (Be extremely careful during this step in the process. You will be working with flammable liquids. All caution should be taken to do this in a well-ventilated area away from heat and flame.)
Soak in kerosene for a couple of days to soften goo inside. Next brush cable with a wire brush and solvent (or gasoline). Boil in soapy water to degrease and remove the solvent/kerosene fumes. Rinse in hot water and blow dry. Bake to remove all water immediately.
Step 2: Weld ends of cable
I tig weld (you can torch weld, stick weld or wire weld too) the ends of the cable solid. Small pieces get a handle welded on also.
Step 3: Prepare a water mix for quench cleaning
Water mix is prepared by adding one box of 20 Mule Team® Borax to a five gallon bucket of water (I use a metal bucket). Heat and stir.
Step 4: Quench Cleaning
Heat cable in forge to a dull cherry color and quench in water/blux (borax) mix until bubbling stops. I repeat this step two or three times for a couple of reasons. As the metal rapidly cools, it forms a scale that pops off in the water. This scale takes all the trash out that is leftover inside the cable after cleaning. It also sucks the flux up into the internal pockets of the cable making it easier to stick together in the welding phases. After the third heat and quench, I know flux is inside as deep as I can get it.
Step 5: Twisting the billet
Heat to bright orange (almost yellow) and twist. Keep heating, twisting and fluxing until you can get the cable no tighter. Bring billet up to yellow and work the burps out. Tap the cable with hammer up and down the billet to work the burps out, all the time twisting in one direction. This reduces the diameter slightly and tightens the inside. Once you have worked all the burps out, repeat the twisting process.
Step 6: Shaping the billet
After the second twist, shape the billet leaving it a little fat. Heat and clean with a wire brush. The billet should be ready for dipping in the brass pot.
Step 7: Now the brass
This is the neat part. My brass is now a liquid metal (approximately 1650°-1750°) sitting ready in a pot. When the billet is HOTTER than the brass, dip it in the liquid brass until it stops bubbling. The softer metal is sucked up inside the billet, similar to “tinning” the end of a wire before soldering. When the bubbling stops, remove the billet and let it cool a few degrees until it is slightly cooler than the liquid brass. Dip it again. This puts a heavy coating on the outside like a candy shell. Immediately press it “ever so slightly” to flatten the face and push loose “plastic” brass inside and out the top.
Step 8: Grinding and Annealing
Let billets cool and grind to thickness of about 3/8”. Anneal (soften) billets in oven at 1550° for an hour. Turn off the oven and let cool slowly inside.
Step 9: Using the billet
Next day split the billets for bolsters or drill and slot for guards. Cut and grind to shape. Fit and polish.
Step 10: Remove and blue with torch or in oven at 385° for two hours.
Bonus – Hear people say “Oh!” when they look at it.

12. How to Build an Anvil Mounting Stand by Bob Warner

Purpose of this Equipment
The anvil is a central part of the blacksmiths/blade smiths shop. The anvil stand is important for holding the anvil securely and it must absorb some of the shock of the blows to the anvil face. The ideal method of mounting an anvil to me is to find a six foot section of tree trunk and bury the trunk in the ground with just enough sticking out to have your anvil at the proper height. In my case I did not want to permanently mount my anvil or permanently locate it in one place. I wanted to be able to move it around the shop whenever I wanted to. I also wanted it to be sturdy and stable.
Materials
30 gallon drum
9 sections of 4”x4” posts
12 5/8” threaded rods 15” long with flat washers, lock washers and nuts for each end
Two bags of sand
Two feet of 1”x4” board
1-1”x 1/8” piece of strapping about 4’ long
3-6” pieces of 3/8” rebar
Construction
First you must determine the height you want your anvil to set at. There are several different ideas of what the proper height of the anvil should be. My method is very simple. I don’t want to bend over to work and I don’t want to lift the hammer any higher than I need to because that will make me tired faster. Therefore, I need a height that avoids both of these situations. The proper height of the anvil for me is determined by standing up straight and let my arm hang down at my side. I make a fist and measure from the ground to the knuckles on my fist. Whatever that measurement is, that is the height I want the face of my anvil. Determine your height by whatever method you want and record the measurement. Take the 30 gallon drum and cut it off at the second band from the bottom. Cut the rolled edge off about 1” below the top of the barrel. Cut about a ¼” out of the ring so that it can be made smaller. Put the rolled edge inside the remaining part of the drum and pop rivet it in place. This will protect from getting cut on the top edge.
Pour about 2” of sand in the bottom of the drum. Level it off well and then measure from the top of the sand to the height you previously determined to be your anvil face height. For example, if you determined your anvil face height to be 35” then you should have a difference of 33” after adding 2” of sand.
After determining your height difference, cut the 4”x4”s to that length. Now you need to drill holes through them. Lay them all out on the floor side by side. Measure 4” from each end and put a mark on the centerline of the board. Each mark, on each board will need to be drilled with a ¾” drill bit. After drilling all 18 holes, turn each of the boards over to a side with no holes in it (rotate 90°). Measure down 5” from each end and repeat the previous process. After you complete the drilling, you can stand all of the boards on end and run the rods through the boards. You should have 3 going across the top in 2 directions and 3 going across the bottom in 2 directions. This will bolt all 9 boards together very securely. Make sure all of your boards are flush on the top.
After you get them all bolted together, put them inside the drum on top of the sand. Pour the remaining sand around the boards inside the drum. Take a hammer and tap around the drum to help settle the sand.
Place a piece of paper on top of the boards and set your anvil on top of the paper. Most anvils have a large “U” shape on the sides of the anvil. Trace these “U” shapes onto the paper. Remove the anvil and the paper, replace the anvil. Take the paper and trace the “U” shape onto the 1”x4” boards and cut them out. Place the boards inside the “U” of the anvil and screw them down. Now the anvil will not move but can be picked up and removed if desired.
If you desire, you can now make a tong ring. A tong ring is a round ring that goes around the top of the drum but is larger than the drum. The rebar pieces are used to make hooks that hold the ring in place around the anvil. You then can hang your tongs on this ring so they are available when you want them.
13. How to Build a Coal Forge by Bob Warner
Purpose of this Equipment
The coal forge is one of the fading pieces of equipment for the knife maker. Propane forges are rapidly becoming the norm. Coal is getting harder for the general population to obtain and sometimes it is required to buy it and have it shipped in. This makes it costly. However, if you can get it easily and in fairly large quantities, you may want to make a coal forge. I used a coal forge since I started forging until I built by first propane forge about six years later. I still have the coal forge and keep coal on hand because when you run out of propane on a Sunday evening, it is nice to not have to stop working but instead just fire up the coal forge and keep right on going.
Materials
Like most other tools I have, the base materials come from the scrap yard. The pieces you would need to build a forge like mine are the following items.
1-1/2” angle iron
1/8” steel sheet
Car brake drum
2” piping from hardware store
Electric blower about 150CFM
Construction
Cut your 1/8” sheet to the size you want your forge to be. Mine is about 3” square. Yu use the angle iron to build a table using the 1/8” sheet for a top. Build a frame for the top to sit on but be sure that one side of the angle is pointing up, instead of down. Build the rest of the frame of the table using your angle iron for the legs and the bracing.
Take a straight edge and draw an “X” on the 1/8” plate to locate the center of the plate. Get the car brake drum and measure the outside of the brake drum to determine the size of a hole to cut in the plate so that the brake drum can be recessed into the plate. Cut the hole in the plate using whatever method you have. DO NOT exceed your hole size or you will have trouble later. The smoother and rounder this hole is the better. Place the brake drum into the opening allowing it to rest on the flange. Grind off as much as possible that is protruding about the plate without risking weakening the drum. Remove the drum and turn over. Weld the holes closed where the wheel studs used to pass through. This will leave the center opening only. Get a reducing bushing from the hardware store that is large enough to cover the center hole in the brake drum one end and as large as possible (but smaller) on the other end. Weld the reducing bushing in place, wide end on the brake drum. After welding the reducing bushing in place add a 6” pipe nipple to the opposite end of the reducer. Then add a tee onto the pipe, add a 6” pipe nipple to the two open sides of the tee. On the bottom pipe nipple, you need to add a cap. There are a couple methods to doing this; I just screwed a pipe cap onto the end of the nipple. If I were to build another coal forge I would do it differently. I would get a piece of flat plate large enough to cover the end of the pipe. I would weld two small pieces to that with a hole in it. I would also weld a small piece of steel to the side of the pipe. These three pieces, two on the plate and one on the nipple could receive a pin. These would make a hinge. I would also weld a ¼” rod to the plate under the hinge about 10” long and put a weight on it. All I would have to do is lift the weight to open the end of the pipe. On the open end of the horizontal pipe you would attach the output of your 150CFM blower and add an on and off switch.
Air flows from the fan up through the brake drum and through the coal. The ashes fall through the holes in the grate and collect in the lower pipe nipple. Just lift the weight at the end of the ash dump and the ashes will fall out let go and the dump will close.
I like my coal forge and don’t think I will ever be without one as long as I have access to coal.


14. How to Build a 9" Disc Sander and Stand by Bob Warner
Purpose of This Equipment
The disc grinder is a tool that many knife makers have and use often. It is great for flattening steel and flat grinding blades. It can be used for many jobs in the shop.
Material
Sander:
Motor
Electrical switch and wiring
9” beveled disc
Printed with permission from Rob Frink of Beaumont Metal Works.
The disc was purchased from Beaumont Metal Works at http://beaumontmetalworks.com/ contact Rob Frink for information on this item as well as many other well made products. I highly recommend products from this company.
Stand:
Truck brake drum
Plate steel
6” square tube (square pipe)
Construction
Stand:
The stand was built by taking a brake drum from a truck (18 wheeler type truck) and placing it face down on the floor. Then a 6” square tube was welded on top of the brake drum. Then a round steel plate was welded on top of the 6” tube to act as a small table. The 9” disc was mounted onto the shaft of the motor and the motor was located in a position that allowed the disc to extend past the edge of the stand. The motor was mounted to the table top, the electrical wires ran and a switch was installed. Did I mention I like “heavy duty” things?
15. Tips and Tricks by Bob Warner
WD-40 is some great stuff. Here are a few uses for it.
WD-40 will remove epoxy from areas you don’t want it, including your fingers.
WD-40 can be sprayed onto your grinding belts to reduce heat and extend belt life.
WD-40 takes masking tape gum right off your blade.
WD-40 if sprayed on titanium will show you the grain pattern of the titanium.
Knife maintenance
Use Carnuba wax to coat your knives to avoid tarnishing and keep them shining.
A pair of panty hose works GREAT for putting the final polish on an oil finished handle (or gunstock).
File work
Use carbide cutters in your router (upside down) to start your file work. This makes the half rounds in a very short time. All file work should be done in annealed steel if possible.
Practice new file work patterns on the part of the metal that is going to be ground away. Then when it looks right, you can put it where you want it and you’ve practiced on the same metal that it’s going to end up on.
Titanium
To remove broken taps from titanium, soak in muratic acid. The acid will eat the tap but won’t hurt the TI.
Titanium has a grain, just like steel. There will be less chance of a lock failure if you always cut out the lock side with the grain going length ways.
Don’t breathe the fumes from titanium, they will make you sick.
Don’t use your best belts on titanium. Titanium will dull them quickly. However a really dull belt will not cut well and will just “push” the titanium around.
Jewelling is normally done with a brush or rubber or fiber stick (like a “pencil eraser” in a drill press). The brush or rubber/fiber cylinder is charged with an abrasive and then lowered onto the surface to be jeweled. The circular marks are made in a line, slightly overlapping each other, and then the next line started to overlap the first, etc. Most gunsmithing books in the library will have a “how to” discussion on this. It helps to have an indexing jig to get nice even spacing and straight lines.
When polishing titanium get as many scratches out of the material as possible. Hand sand to 600 grit, removing ALL the scratches. Wet sand with WD40. Then use a cloth wheel on the buffer with white stainless compound, and use LOTS of heavy pressure. The metal heats up pretty quick this way. Turn the work 45° and buff again, using as heavy pressure as possible. You will get an absolutely prefect mirror finish that looks like platinum.
General Knife Making
Use vinegar to clean up epoxy while it is still wet.
Glue a scrap of leather to a wood block. When you sand it makes a nice cushion and helps the paper conform to the shape you are sanding.
When gluing handle slabs use wax paper around them to keep the epoxy from sticking to the clamps.
Tape a few strips of masking tape onto your counter top. Mix your epoxy on it and pull up to clean up.
Consider getting foot switches for some of your tools. A drill press can be easy to use when you just walk up and step on a pedal to make it run, let go and it stops.
For creating great plunge cuts, hang the belt off the edge of the wheel a little. BREAK the edge down a little by using scrap steel to roll it around the edge.
To remove solder from blade/guard joint, make a small chisel out of copper. The copper is softer than the steel and nickel silver or brass you use for the guard so it will not scratch anything.
Use pieces of scrap leather to hold knives in a vise. The leather will not let the jaws damage the blade.
If you don’t have a surface grinder and want to get something flat, try taping a piece of sandpaper to a thick piece of glass. Sand on the flat glass. Mark the blade with a black “Sharpie” marker and it will show any uneven spots on the steel. Use a micrometer or calipers to check thickness and the length of the piece.
A chisel made of bamboo works well for removing epoxy from unwanted areas.
When completely through with a folder, clean all threads of the pivot with acetone before using loc-tite on the pivot screw.
When buffing thin blades 1/16” thick, take a piece of 2x4x18” and drive a finishing nail into one face near the end with about ¼” exposed. This end becomes the top. Hang the blade on the nail by the top pin hole and with the blade resting on the face of the 2x4 buff the face then turn the blade over and buff the other face.
The best file handle I have ever seen is golf balls. Take a golf ball and carefully drill a hole a little smaller than the file tang. Jam the file into it and you’re set to go. Works real well when pushed with the palm of the hand.
Try putting a few drops of dish soap in the water you use to catch grinding grit and cool things off. It keeps the water molecules from hooking together right so the grit can’t float.
Put in about a ½ cup of baking soda into five gallons of water, this helps stop steel from rusting during grinding and cooling in your dip bucket.
To keep a file from marking up the tang and making a nice little groove when filing guards and bolster. Grind any file teeth off of the edge of the file and just slightly touch the edges to grind any sharp edges off. This will let you be able to file right next to the tang or blade without making scratches or grooves.
Use the rubber soles on old sneakers to clean your grinding belts! They work great.
Stick a magnet to the side of your drill press. Then stick your chuck key to the magnet for easy to find storage.
Mount a sheet of plywood to the ceiling of your shop and screw the lids of baby food jars to it. Then you can store items in the jars and put them on the ceiling for storage. Just look up and find the item you want.If you are preparing to build a new shop, cover the interior walls with plywood. This gives a solid surface for hanging stuff. You can pound in a nail anywhere you want and get a good solid spot.
Glue strong magnets to the bottom of a cookie sheet. This will keep small parts from rolling off of the table during final assembly of your knife.
Cut a piece of heavy cardboard a little bigger than your knife blade. Push the blade between the layers and then cover with duct tape. You now have a very durable temporary knife sheath to protect your blade during the rest of your work.
Slip a piece of rubber bicycle inner tube over the blade. The rubber is incredibly tough and if the knife isn’t sharpened yet, it will even take a few misplaced file strokes without tearing through to the mirror polished blade.
If you need to use an open housing motor in a workshop, cover it with nylons. They will keep the dust out of the motor.
Heat Treat
Here’s a tempering table for 0-1:
Temperature Rockwell hardness
200° 63/65
300° 63/65
350° 62/64
400° 60/63
450° 60/62
500° 58/60
600° 55/57
700° 52/54
800° 48/50
Temper small pieces by heating a bar of steel on which the piece to be tempered is placed. This gives a great deal of control because the steel heats more slowly than a small piece and the color is more discernable since it is not being held in a flame.
To prevent scale during heat treat, use a mixture of borax and boiling water and dip the blades in…1/3 borax in a container and fill the rest with water bring to a boil…dip blade in, let dry then go about your normal heat treating. When you quench in oil the protective borax cover will flake right off and leave you with a blade that looks similar to what you started with and you won’t have to grind that stubborn scale off!! Works great!!
SUPER QUENCH-super quench is the term coined for a concoction developed to allow low carbon steels to be hardened to some extent. It is a mixture of water, borax, liquid dishwashing soap and a surfactant to eliminate as much surface tension in the water as possible. Even with low carbon steel like 1018 it is possible to make it hard enough to cut unhardened mild steel. This quenching liquid works by wetting the surface of the steel and eliminating all the steam blanket effect. The steel must have a minimum amount of carbon or it will not harden. Too much carbon and there is a risk of catastrophic failure of the work. Start with 5 gallons of water (a plastic dry wall mud bucket) and add a large container 16oz of LIQUID DISHWASHER SOAP. Mix it up, and then add salt until no more will dissolve, and add at least a handful more. Mix in a bottle of Jet dry dish washing spot remover. Keep the container covered. To use, get the part bright red and then plunge it into the solution with agitation in a small circle. You want to stir it rapidly around in about a 3” circle. When it’s cold, check the hardness with a file. You’ll be surprised how hard some things will get. NEVER use this solution on spring steel, or anything else that has high carbon content, or that you are uncertain as to the carbon content. You risk shattering the piece and hurting yourself in the process.
Kydex
Use MEK to rub the edges of your kydex sheaths. Smooth the edge down to a nice shiny finish by melting the plastic.
Good to Know
Cutco knife handles are made from bowling balls.
Keep a notebook handy in your shop. Make note of as many things as possible. This will save you a lot of time when you don’t have to measure everything ten times and you won’t forget those shop tips either.
Use fluorescent lights throughout the shop. But when you get down to the final finish, use an incandescent light (light bulb). The fluorescent lights hide a lot of sins. The incandescent shows all.
A rare earth magnet will help get metal splinters out of your hands.
Paint the walls of your shop white. It will bounce light around and you will be able to see better.
A magnetic chuck can be made by disassembling an automotive air conditioning compressor. Take the pulley and the ceramic magnet off of the compressor and epoxy together. Run 12 volts to the magnet and you have a magnetic chuck. This is a very strong magnet and will hold your blade well. Don’t take too big of bites, it is not so strong that you can hog the steel, just a little at a time.
Don’t think you need a respirator? Blow your nose after grinding for a while; you will want to get a respirator.
Ferric Chloride (Radio Shack circuit board enchant) can be used to etch Damascus. Store in PVC tubes.
Ever worked purple heart? If not here are a couple of tricks to bring out the purple color. After cutting the slabs and getting them down to the finished size, lay them in a window sill and let the sun light shine on them for a day or two, this will bring out the purple color. You can also lightly burn the outer edge with a propane torch to deepen the color but be careful not to over do it. This is all done before any type of finish is applied, after getting the desired color put about three coats of tru oil sanding between coats with 0000 steel wool.
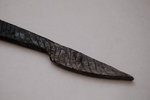
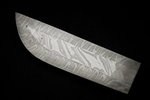
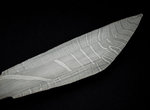
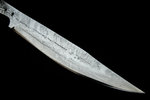
Brass Rod Test
To test your blade lay the edge on a brass rod and push it down to get the blade to flex, then move the blade toward the handle and the blade should flex over the rod and return to normal after it passes over the rod. Do both sides of the blade. If the blade bends and does not return to normal, you went too high on your tempering temperatures and you will need to re-heat treat the blade. If the blade cracks or chips, you went too low on your tempering heat and will need to temper again at a higher temperature. I suggest you do this test before adding bolsters or handle material since they can be damaged during the correcting of any problems.
Here are some pictures of the rod test in process
Storage
Store your buffing wheels in gallon sized Ziploc bags. This will keep them from gathering dust and grit.
Store small parts in film canisters, baby food jars or large Tabasco bottles.
Store sandpaper in stackable in/out boxes like those used in offices.


16. How to Build a Propane Forge and Burner by Bob Warner
The propane forge has become a very important part of the modern knife makers shop. Knife makers and blacksmiths are both starting to use the propane forge more frequently than the coal forge. Propane is an efficient fuel and it is easy to obtain by the average person. The propane forge is another tool that can be made using a lot of scrap materials.
The basic concept of a forge is to have a hot location to place your steel when heating it up. There are many methods available to make this “Hot Box” and I will cover the method I took here and a method I will be taking very soon.
I wanted to build a forge that would meet the needs of my knife making but also allow growth in the event I wanted to start making larger blades like daggers and swords. I have made several forges and the design below is one of my current forges. I will also describe another forge I have that I used exclusively for Damascus making for over a year. My current forge will be described first.
Materials
Forge Parts
8” square tube 18” long
6’ piece of 1” angle iron
3/16” rod
Kaowool
Firebrick
4-railroad spikes
Satanite
Rigidizer
Burner Parts
2-1 ¼” bushing reducer
1 ¼” pipe nipple 12” long
Brass 1/8” pipe cap
Brass 1/8” pipe plug
Brass 2-1” long ¼” pipe nipples
Brass 1/8” tee
Brass 1/8” pipe coupling
2-2” hose clamps
Construction
I wanted my forge to be able to sit on a bench top without the heat of the forge damaging the bench. Therefore, I decided to add legs onto it so it could stand up. The legs I chose for my forge are simple railroad spikes. These are welded to the outside of each corner. I suspended the tube in the air by sitting it on a firebrick. I then held the railroad spikes to the tube with vise grips and welded the spikes on.
The next thing to do is to cut holes in the top for mounting the burners. I decided on the burner locations by dividing the forge into three equal sections of 6” each and centered each of the two burners a little wider than the two marks. I wanted the heat on the ends. I marked the locations for the holes and then held the 1 ¼” pipe in place and traced around it. I drilled holes all the way around the inside of the circle very close together. Then using a file and a rotary file, I cleaned up the holes. Then I placed the 1 ¼” pipe nipple in the opening and let it slide all the way through to the floor of the forge. This left about 4” remaining above the forge. Make sure that it is straight up and down, then take a 2” piece of 1” angle iron and hold it against the pipe so that it cradles the pipe. Slide the angle iron down to the top of the forge and weld it to the forge. This will be the burner mounting bracket. Do the same for the second hole. The burner (12” pipe nipple) will be secured to the brackets with hose clamps.
The next thing to do is to work on the front and back doors. The two doors are identical so only one description is shown.
The doors are nothing more than a piece of ¼” plate, framed with angle iron that has a hole cut in it with a small shelf. This is very easy to build by first cutting an 8” square of ¼” plate. Then the opening has to be cut by first determining where it should go and how large it should be. If you plan on forging Damascus or other items that may be fairly large, you may want to carefully consider the opening size you choose. For my forge I wanted a 2 ½” square opening. I wanted it located at the same level as the height of a firebrick. To decide the hole location, place a piece of Kaowool on the floor of the forge and place a firebrick on top of it. Measure the height and transfer that height to the door plate. Draw out the 2” square. Then I decided to add a small shelf at the opening so I moved the entire opening down ¼” to accommodate a ¼” plate for a shelf. I cut the opening with a cutting disk in my angle grinder from the back side. This gives a good clean look on the front side. Then I placed a shelf into the bottom of the hole and welded it on. The shelf protrudes about 1 ½” out of the hole and about ½” inside the forge. Then frame the plate with 1” angle iron to complete the door.
There is also another part of the door that needs to be discussed and that is how it is mounted to the forge. I wanted to be able to open the door and take out a dropped part or to reline the forge. Therefore I had to determine a method to make the door open easily. I made hinges that I mounted to the top of the door and the forge. The next diagram will give the details of the door building and the hinge building. Then just add a handle for opening the door.
After building and installing the door, it is time to go on to adding the refractory. You may want to take one extra step at this point but it is not required. Take a few short screws and weld them to the back of the door pointing into the forge. This will give something to hold the Kaowool in place. I did not do this but have seen it on other forges and it was successful. Just press the Kaowool over the screws and they will hold it in place.
The installation of the Kaowool is very easy. You just cut it to size and roll it up and put it inside the forge. Unroll it and push it out against the walls. Take a pair of scissors and cut out the holes where the burners will enter the forge. Cut out Kaowool to fit the doors and put it in place cutting out the holes for the openings. Wear a respirator to do this because Kaowool is fibrous and you can inhale the particles. Wear gloves so you don’t get the “itchies.”
The Burner
Building the burners is simple and is almost all bolt together. Just a couple of holes to drill and the burner will be built quickly. Rupert Wenig designed the burner and has given me permission to post it here. The first thing to do is drill two holes in the wide end of the reducing bushing. This will be the method for mounting the internal parts of the burner. I have used this burner on every propane forge I have made. I use it for making Damascus as it reaches forge welding temps easily. I also use it for general forging. It is simple and easy to make and will serve you well. It is not a forced air burner, to make it a forced air forge, all you have to do is thread a pipe onto the top of the reducing bushing and hook a hose from it to a blower. The burner performs great without forced air but it also performs well as a forced air burner. I did it on my Johnson forge because the Johnson is set up that way and the same burner works great this way also. You won’t regret building this burner.
I cannot give enough credit to Rupert for this burner or for allowing me to add it to this tutorial. I am a person that finds something I like and it is hard to get me to change. I can’t see any reason to change from this burner and expect to use it until someone can prove that another design is better. The choke plate is simply a flat plate of thin metal that is mounted with a screw. The place can be rotated over the top of the burner to restrict airflow. It can be used to adjust the output of the burner. Personally, I do not use it. I use a cap on the tee and drill a hole in it for the fuel jet. I started with a #60 and kept adjusting until I ended up using a #52 drill.
When I built my first forge, I used this burner and was surprised at the performance. I took my forge to a Blacksmiths meeting and set it up. Several people were interested in it and told me how a venture burner did not perform as well as a forced air burner. I just fired it up and put a 3/4” solid rod into the forge and in no time you could see the metal dripping off the rod. Everyone was convinced of its abilities after that demonstration. I have two of these burners on the forge described here.
17. How to Build a Forging Stand by Bob Warner
Purpose of this Equipment
The forging stand is a simple piece of equipment that comes in very useful when using a propane forge, or any forge for that matter. The stand is nothing more than a place to put the handle of your work-piece to assist in holding it in the forge without you having to hold it. Sometimes the work-piece is heavy and difficult to hold for long periods of time. This piece of equipment can be made in a very short time with a minimum of materials.
Materials
The materials for the forging stand are materials picked up at the local scrap yard. I located a piece of 3” pipe, a plow disc, and some miscellaneous metal. The only thing I did not locate at the scrap yard was a piece of 5/8” threaded rod and two nuts for the rod.
Construction
Determine the general height of your forge opening. You will want to cut the pipe so that it is about 6” shorter than the opening to your forge. The plow disc acts as the stand. Weld the pipe to the plow disc so that it stands straight up. Get a piece of flat stock and cut it to a circle 3” in diameter. Drill a hole in the center ¾” in diameter. Weld the 3” plate on top of the pole. Weld a 5/8” nut to the hole in the flat plate.
Get a piece of ½” square stock and bend it into a “U” shape with a fairly wide bottom. Weld the threaded rod onto the bottom of the “U”. Take a piece of ¼” round stock about 6” long and weld the second nut to the center of the rod.
Assemble the pieces together as described below.
By turning the “U”, it is possible to screw the threaded rod in or out to adjust height. When the desired height is obtained, secure that height by turning the nut with bar welded on down against the other nut and tighten. The height will not change unless you change it.

18. Knife Making 101 by Bob Warner
Here is some information I think all new knife makers could use when starting out. This information is what I gathered when starting and I give it to the beginners as a helpful guide. By no means is this telling you that this is the only way to start but it works pretty well and gives you an idea of what you need for tools at different levels of knife making and a lot of places for resources. If you know of any other information that would be helpful here, please contact me and let me know about it. I will add it to this page.
First I want to point out that I like to forge my blades. Therefore this includes information that concerns forging. If you have no interest in forging, ignore those portions of this information.
If I were to start out today, knowing what I know now, I would do the following:
Look for a LOCAL blacksmithing association.
You can probably go to a few of their meetings without joining but the sign-up fee is usually cheap. These people usually have their meetings at someone’s shop and put on demonstrations. This is really the BEST place to learn next to being invited to a BLADESMITH’S shop. These people are VERY willing to teach you how to do things. They are not knife makers (usually) but they do know steel and how to move it around.
I learned about forging from blacksmiths and about heat treating from a heat treating place that did my early knives. These people will teach you a lot. One thing I see when talking to new knife makers is their desire to be accepted as a knife maker. Many times they will try to talk about things that they may not really be that knowledgeable about but talk as if they have a complete understanding of it. I recommend you don’t do that. You are interested in learning so try to learn and not teach or prove you already know something. Ask your questions and let the info sink in. Match it up later with the knowledge you already possess and then decide your next steps from there.
Tools
I would get the following tools in this order:
First set of tools-
Safety glasses
Respirator
Small drill press
8” grinder (remove grinding stones and put buffing wheels on it)
Files of all sizes and shapes. You can’t have too many files. Use golf balls for the handles; see the Tips and Tricks section of my site.
A solid vise
Some method of marking your knives with your name. A stamp, electro-etch or even a vibrating tool.
Sandpaper of all grits down to about 1500 to 2000.
This will get you through the creation of knives by filing the knife to shape.
Second set of tools-
OK, here is where you need to decide how serious you will be. If you plan on making knives for a long time (not just 10 or 12 and give it up).
A good band saw is $500-$1000.
A commercially made belt grinder is $800 without motor and they go up from there.
A forge is cheap but a lot of work to make (mine was about $50), or expensive if bought.
An anvil is about $1.50 to $3 per pound and you will want at least 100lb if you’re a moose like me.
For the REAL SERIOUS-
Hydraulic press, speeds up making Damascus
Surface grinder, gets stuff flat
Anodizer coloring titanium
Heat treat oven, or use your forge if you have one, some have both
Carbon monoxide detector if you have a forge
Tempering oven (use the one in the house)
Cryogenic treatment station, part of the heat treating process
Acid etching station, for etching Damascus
Gold plating station, if you want to get fancy
Bluing station, if you think you would want to blue your stuff
Mini metal lathe, for making parts
Milling machine, to do the stuff I can’t do
Electro-etching station, for putting on your mark
Photo transfer station, to make your own stencils
Lots of stuff to learn.
Browse through this stuff and you will see that this can get complicated if you let it. You can make knives simply and functional or very artsy and still functional. I would do stock removal (grinding your own blades from flat stock), then to forging, then to making Damascus, then to pattern welded Damascus (where you control the designs in the steel, real cool).
Just check out the sites below and you will find a LOT of information.
There is probably no place to get more information and tips than from this guy. Bob Engnath passed away a while back but his family kept the page up in his memory and to satisfy all of the requests to do so. Check out EVERY part of this page, there is not enough time in your working life for you to learn everything by trial and error.
If you want to pound steel, here is a page about gas fired forges. The web page by Ron Reil is full of great information. I recommend a mini mongo burner since I build it and love the results. This is also the site to how to build the Freon tank forge. This is similar to what I made but mine is bigger and more heavy duty (I also have a small one). This would get you going for over a year of regular use before you had to rebuild it or make a new one.
Rob Frink can make darn near anything. You may be able to get him to make it cheaper than ordering it from a knife supply store. I have a KMG-10 belt grinder from here.
This is a list of stuff and the type of steel it is made from. Great for starting out blacksmithing. I buy new steels to guarantee what I am getting.
19. Knife Making Frequently Asked Questions by Bob Warner
I want to answer many of the questions that knife makers are asked repeatedly. Experienced knife makers like to help beginners, it takes time to help and providing the same help repeatedly take a lot of time. The following questions are questions that re often asked by new knife makers and I want to answer them for you now. Hopefully it will speed up your learning and it will also assist the experienced makers by eliminating a lot of the repeat questions to them. These answers are my answers and not every maker will agree with them. Feel free to ask for other opinions and then make your own decisions with your new knowledge. I refer to the knife makers as “he” but it is acknowledged that there are many knife makers that are women and they are included equally here as knife makers.
Bob Warner
How long does it take to make a knife?
The time it takes to make a knife varies depending on several factors. Is the knife made totally by hand or are machines used? Does the knife maker do the heat treating or is the blade sent to others? There is no really good answer to this question because of the variables and also because different people work at different rates. Knives for me take anywhere from a few hours for a small utility knife to several months for other fancier knives.
What is “custom?”
Custom is a term that gets debated a lot. To me “custom” means out of the ordinary. If I make a standard style of knife and a customer wants me to specialize it in any way, the outcome would be a knife customized for the customer. If a customer wants to design a knife and specify materials, the outcome would be custom. It was built to meet the previously stated requirements of the customer.
What is “handmade?”
Handmade also creates a lot of debate. For me, “handmade” means that I controlled every aspect of the making of the knife. Nothing is performed by a machine without me being involved. I use machines to assist me in my knife making. The machine does not do the work, I do. For example, my grinder does not grind the blade, I do. The grinder does nothing but make a piece of sandpaper move quickly. It is my ability, knowledge and skill that moves a piece of steel against this moving sandpaper to create the knife. Machine made would be similar to putting a piece of steel in one end and having a knife come out the other. Many knife makers consider the use of CNC controlled machines to make a knife not handmade since the machine controls the operation.
Can I ask a knife maker if I can visit his shop?
Yes, if you go about it politely. Contact the maker you are interested in visiting and introduce yourself. Explain your goals and that you have questions that a visit to a shop would answer. Ask the knife maker if they accept visitors and if they do, under what circumstances. I accept shop visits to my shop but only if I have no pressing orders. You must remember that the goal of the shop is to make knives not entertain visitors. I would think that most makers will let you visit if they have the time. Many makers will not be interested in firing up all the tools and making a knife for you, nor will they want you messing around with their tools. When you get there, ask all the questions you want and take notes. Do not start turning tools on or picking things up. Only do what the maker invites you to do. I may hand you a piece of steel and tell you to grind it, or I may try to get you to leave quickly. It all depends on how you act at my shop.
Will a knife maker reply to my questions on e-mail?
Yes, if you go about it politely. Contact the maker you think can help you with your question. Ask the maker if there is a place to go to get your questions answered, then ask your questions. Don’t ask 200 questions in one e-mail. It takes time to respond to you and you must be aware that the knife maker is answering you out of kindness not because he has to. He wants to help but he does not owe you anything, you are asking a favor of him so please be polite when asking him to spend his time to assist you. Be sure to reply after your questions are answered thanking them for their time. It all depends on nothing more than just common courtesy. Also, adding a knife maker to your list of people you send jokes or inspirational material may be something you want to do, I personally do not want to be added to these lists. I have dial-up internet service and it takes a long time to download the many daily e-mails I get about knife making. The jokes, pictures and other things take up even more time. In addition, I don’t open e-mails that have attachments due to the possibility of viruses. I also do not open e-mails with titles that are blank or just say “Hi” or “Check this out” because there is probably nothing in these messages I am interested in reading.
Is there a knife show in my area?
There are knife shows all over the country. There are also a lot of Gun & Knife shows all over the country. You may want to look at the web pages of knife makers and see if they have a page telling what shows they plan to attend. Check several web pages and you may find some planned for your area. You can also contact organizations such as The Knife makers Guild or The American Bladesmith Society to see if they have shows listed. Knife making magazines such as Knives Illustrated and Blade often list show schedules.
Will a knife maker repair my knife?
Probably not unless he made the knife himself. The knife maker wants to make knives, not repair them. Repairing knives usually is done by people that have repair as their primary objective. If your knife was handmade, you can probably get the knife maker to repair it for you, either under the warranty or if you misused the knife, you could probably still get it fixed but at a cost. If the knife maker that made the knife has passed away or is not making knives any longer, you may be able to get another knife maker to do the repair at a cost.
What tools are needed to make a knife?
This is probably one of the most asked questions. The answer, a file, and a sharpening stone. That’s it, just that simple. File a piece of steel to the desired shape and sharpen it with the stone. That is making a knife at its most simple form. Actually, and more realistically you need a file to shape the knife and to shape the blade bevels. You need a heat source to heat treat and temper the knife and you need a drill or drill press to drill holes. These things and some sandpaper and epoxy and you can make a very nice knife. You can really go nuts buying tools but these are the only MUST HAVE tools.
Do I have to spend all that cash on tools?
No. Make the ones you can. I have built most of my tools. Tools are expensive, especially when you get into grinders and presses. You only need the tools to speed up the knife making process so get the tool you feel will most benefit you. After making a few knives, get the next tool that you feel will benefit you the most. Let your knife sales pay for the next tool. Eventually you will have everything you want.
How big should my grinder motor be?
Belt grinder motors should be 1HP minimum. The speed should be 1725RPM. Probably the best motor, if you can find one or afford to buy one is a 2HP variable speed motor at 2500RPM.
Can I use 3-phase motors?
Three phase motors will not run on regular home type electrical connections. MOST people do not use three phase if their shop is at their home. You can use it with some special phase converters but most find it impractical to go through the steps to make it happen. A simple search for phase converters on the internet will help you learn more about three phase use in a home shop.
120V or 240V?
Both are available to home shops. 240V uses less amperage and is therefore cheaper on the utility bills. 240V is probably not already wired into a garage or your workshop without you already knowing it. To run 240V equipment you will probably need to run new wiring for it. There are books available in home improvement stores or a search on the web can find what you need to know to wire up a 240V machine.
What is a pin vise?
A pin vise is a vice made to squeeze the pins used in knife making. Many people use a pin vice instead of peening the pins with a hammer. It is made with a hydraulic jack and a metal frame. The knife is placed between the jack (below) and the frame (above) and the jack is jacked up to squeeze the pins until they spread out and completely fill the holes they are installed in.
What is a grinder?
The grinders use in knife making is different than the bench grinder your dad had with a stone wheel. The grinders used for knife making are actually belt sanders. Most belt grinders use 2” x 72” belts that run on wheels. The knife is ground in different ways depending on where on the grinder the steel is ground. A lot of the grinders used by knife makers are home built. Probably the best setup for a grinder would be a variable speed motor with a flat platen and a wheel so flat grinds, hollow grinds and convex grinds can all be made on the same machine.
What is an anodizer?
An anodizer is a machine that is used to color reactive metals like titanium. The anodizer creates an oxide on the titanium that blocks different colors. The thickness of the oxide determines the color that the metal will be. Adjusting the voltage that goes through the solution determines the thickness of the oxide on the titanium and therefore the color.
Treadle hammer?
A treadle hammer is a mechanical device that has a hammer and an anvil. The hammer is suspended above the anvil and held suspended with springs or weights as counter balance. The user takes hot metal to the treadle hammer and places it on the anvil. Using his foot, the operator steps on a pedal and the hammer comes down onto the hot metal. The harder the operator steps on the pedal, the harder the hammer hits the hot metal. Here is a picture of a treadle hammer that belongs to Jonathon Loose an artist and fellow knife maker at http://www.jloose.com/studio.html.
What is a power hammer (also known as a trip hammer)?
A power hammer is similar to a trip hammer. The bid difference is that the power hammer is motorized. The harder the operator steps on the pedal the harder and faster the hammer hits the hot metal.
How big of an anvil should I buy?
Basically anvils are one of those “bigger is better” items. Get the largest anvil you can afford. Knife making does not require a large anvil and many people don’t even have an anvil. Many people just use a piece of railroad track as the anvil. Just grind the top of the track flat and start forging. All you really need is a big hunk of steel to forge. An anvil has qualities that a big hunk of metal does not have like rebound and geometry and is definitely an asset. If you have the opportunity to get an anvil, do so but don’t worry too much if you need to use a piece of track, a lot of good knives are forged on track.
What is a surface grinder?
A surface grinder is a grinder that is designed to grind material flat. The grinder grinds one side flat and then you flip it over and grind the other side. The entire piece is then parallel on both sides and the thickness is the same over the entire length. Surface grinding is not necessary but very nice is you have a machine. When a knife maker starts making folders is usually when he starts wanting a surface grinder. Precision ground steel makes folder making a little easier.
What is a post vise?
A post vise, sometimes called a leg vise, is a vice that is shaped a little different than most vices. A post vise is designed to be mounted on a post instead of a table. There is a leg that extends down to the ground. The vice can be used for hammering on metal and the shock of the hammer blows goes through the leg to the ground. This is a very useful piece of equipment and if you can find one, I recommend you get one.
I have some money, should I get a press or a power hammer?
Personally, I like the press. I decided to build a press instead of look for a power hammer because the press is more versatile. The power hammer is faster at drawing out the steel but the press will do it also. The press will help greatly with making Damascus and that is why a lot of makers want presses.
What steel should I start with?
This depends on who you talk to. I personally like to forge so I think 1084 is great to start with. Most people that forge can heat treat 1084 relatively simply with good results. Many stock removal knife makers like 440C to start with. Even if they don’t have a heat treat oven it is easy to find people that can heat treat 440C.
Can I make a knife out of a chainsaw bar?
Yes. Chainsaw bars make decent knives. A lot of knife makers use them and make very good knives. You need to be sure what the steel is so you can heat treat the blade correctly.
Can I make a knife out of a saw blade?
Yes. Like chainsaw bars, many great knives have been made from these also. You need to be sure what the steel is so you can heat treat the blade correctly.
Can I make a knife out of a file?
Yes. Files are probably the most used steel by beginner knife makers. Files are handy and most people have them in their possession. A lot of people have heard from their grandfathers or fathers that someone made a knife out of a file and therefore more people are aware that files can be used more than most other recycled material. You need to be sure what the steel is so you can heat treat the blade correctly.
What is Damascus?
Damascus in modern day knife making is actually pattern welded steel. The steel is made by layering different steels together and welding them into one large piece. These pieces are folded or twisted to mix up the layers of different steels. After the steels are mixed as desired by the knife maker it is either forged or ground into the shape of a knife. After the knife is ground to final shape, the blade is put into acid and the acid attacks the steel and eats away at the metal. Since the steels are different inside the blade, the acid attacks them differently. The result is the pattern of the steel starts to show like the grain in wood. Damascus is a very popular steel to use and can be made in many patterns.
Can I use leaf springs or coil springs for knives?
Yes. Most steel used in American cars are made with either 5160 or 1095 steel. Both are excellent steels for knives. Like chainsaw bars, files and saw blades, you need to know what the steel is so you can heat treat it properly. 1095 and 5160 need to be treated differently and if you don’t know the steel type, you may not get the right treatment.
Railroad spikes for knives?
Railroad spikes make some great looking knives. Unfortunately they are not made of good quality steel. They are very low in carbon and therefore do not harden when heat treated. They do get harder but no where near the hardness needed for a quality knife. Use them and make knives out of them, I do but be sure your customers know that they are novelty items only and should be displayed or used as letter openers. They are a cheap source of steel for forging practice. There are some marked with “HC” on the head and it is claimed that they are high carbon but they are still not as high as good quality knife steel.
Can I copy someone else’s design?
Designs have been copied for many, many years. The Bob Loveless 4” drop hunter is probably the most copied knife of all of the handmade knives. A very large number of makers have copied this knife for several reasons. It is a very good looking knife and it just “looks right.” Many people have seen this knife and it has been imprinted in their minds as how a knife should look. Some consider copying a design as a way to honor the designer; others do it just because they want to. In general it is hard to come up with new designs since knives are all basically just a handle and a blade. Coming up with new designs is difficult because those that made knives before we did were so creative. Copying a design is generally frowned on buy copying a style is not as bad. Trying to make an exact copy of the Loveless knife would be frowned on but the basic shape of the knife would not. If you make a knife that looks similar to another maker’s knife, give that maker credit for the design.
What is an integral?
An integral knife is a knife where the blade and all metal hardware such as bolsters and pommel, are formed from one piece of steel.
What is file work?
File work is created by taking files and filing areas away on the knife to create a design. File work can be difficult to do and can greatly improve the look of the knife.
Can I do file work on a knife after heat treating?
Yes, you will need to use carbide bits in a Dremel or Router but many people do it after heat treating.
What is the easiest grind?
Probably a flat grind would be the easiest for a beginner. It can be done with or without a grinder. Since most new knife makers cannot just go out and buy all of the tools they would like to have, they have to make due with the tools they have. A flat grind can be accomplished with nothing more than a file and some sandpaper. It takes a lot of work but a lot of knives have been made this way for many years. Hollow grinding is difficult to do without a grinder.What grinder should I get?
Many people have different opinions on this question. After having built my own grinder and also using other grinders of various brands I personally just bought a KMG-10 grinder from www.beaumontmetalworks.com it is an excellent grinder and I am very happy I got it. Rob Frink builds the best grinder going in my opinion.
How do you get the plunge cuts to match?
Plunge cuts are best made by making the plunge cut further up the blade than you want it. You grind your knife blade and then work backward toward the handle until your plunge cuts are right where you want them. When you do the other side, you do it the same way and work until they match.
What are the different types of grinds?
There are three basic grind types.
Hollow grind-created by grinding against a wheel. The wheel creates a curved grind where the curve goes into the blade.
Flat grind-created by grinding against a flat platen on a grinder or by filing. The sides of the blade are flat but angled toward the edge. An end view of a flat ground blade would look like the letter “V.”
Convex grind-convex grind is the opposite of the hollow grind. This grind is created by grinding on a slack part of the belt on the grinder creating a slow curve from the spine to the cutting edge.
Can I grind AFTER heat treating?
Absolutely. The only problem with grinding after heat treating is that you don’t want to get the steel hot. If you get it too hot you will ruin the temper and then you will have to heat treat it all again. When grinding hard steel, run the blade across the grinder and then go directly into a bucket of water to cool it off. Cool it after each pass on the grinder and it will be fine. If your steel gets hot and turns blue, you need to heat treat again.
What is a tapered tang?
Tapering a tang simply means that the tang of the knife gets thinner as it progresses toward the butt of the knife. Tapering a tang is not required but it serves several purposes. One benefit is that the handle is lighter. By removing metal from the handle it moves the balance point of the knife toward the center of the knife. This creates a better balanced knife that feels better in your hand. There is a great tutorial on how to taper tangs that was written by fellow knife maker Don Cowles. Don explains in detail how to taper the tang and has many pictures to show you how it is done.
How thick should I leave the cutting edge before heat treat?
This is a question like many others that is hard to answer. You first have to determine what use the knife will be for and then the type of grind the blade will have. Then the type of edge needs to be determined. As an example on the most copied knife ever, the Bob Loveless drop point hunter. Bob leaves 25 thousandths for the edge prior to heat treat. This is a hollow ground stainless steel blade that is designed for hunting.
How big should my contact wheel be?
There are several factors involved in determining this. DO you want a deep hollow grind? Do you want a shallow grind? How wide will your grind be? Like many other things, what you want for a final product will determine many of the things you do. There is a way to determine wheel size, just go to Beaumont Metalwork’s web page and look at the information Rob Frink put together. http://www.beaumontmetalworks.com/wheelsize.html
What is the difference between stock removal and forging?
Stock removal, simply stated, is to take a flat bar of steel and grind it into the shape of your knife. Forging, simply stated, is to take a piece of steel either flat or round and heat it up. While the steel is hot, use a hammer to pound the steel into the shape of your knife.
I want to start forging, what type of forge should I get?
Forges come in several styles and shapes. There are propane forges that are made from round tubes of steel that are lined with either a ceramic blanket called Kaowool or Inswool or they are lined with a castable refractory which is basically cement that is designed to handle high temperatures. The castable refractory will be the best way to go if you want a propane forge.
Coal or charcoal forges are also very good. My first tow forges were coal forges. I like coal forges. You need to learn to tend the fire but there have been more knives made in a coal forge than any other type of heat source. Coal forges are easy and inexpensive to build.
Coal, charcoal or what?
A coal forge can burn different fuels. You can burn charcoal that you create yourself. You can burn charcoal that you can buy in the form of charcoal for your barbeque or you can burn pure coal that you can buy.
Propane or natural gas?
Both of these fuels can be used for forging. However, natural gas does not burn as hot as propane. If you decide to make Damascus, you will need to weld in your forge; natural gas may be difficult to get hot enough for welding. Therefore propane has proven itself as a very good fuel for gas forges.
What about MAPP gas, it burns hotter than propane?
Correct but it is difficult to get in bulk and you cannot run a forge with those small bottles you get from Wal-Mart. Also, propane can get up to temperatures that exceed your refractory; therefore getting hotter is not necessary.
Castable, Kaowool or Inswool?
Castable refractory is probably the best refractory for your propane forge no matter what you plan to make in it. The castable is durable and holds up well against the flux which eats the ceramic blanket refractories with ease. Castable also withstands accidental damage from poking it with your knife blade during forging.
How do you get mosaic patterns in Damascus?
Ed Caffrey is probably the best knife maker I know that makes mosaic Damascus. Ed creates mosaic Damascus by creating a pattern lengthwise in the steel. If you were to look at a bar of mosaic Damascus from the end, you would see the design. Then you have to figure out how to get that design to repeat itself over the length of the blade. To do that, Ed has created some pictures showing his method. Ed Caffrey shares this and other forging knowledge on his web page at www.caffreyknives.net.
What is heat treating?
Since this FAQ is for the beginning knife maker, I have written the following in a VERY basic manner to get the point across on heat treating. This includes hardening, tempering and WHY we have to do them. I do not explain anything technical that is going on in the steel, just a layman’s way of explaining it so that the point gets across to the new knife maker. After you understand what it is, you can look up the info on the technical info on your own.
Very often people will ask questions about how to temper a blade because they did this or that to it. But being new, they are misusing the terms and getting themselves confused. Therefore, when they ask a question to the more experienced people the answers, although correct, are not really right because the wrong question was asked.
This VERY unscientific explanation may help. I am not going to talk about the steel components and how they react; you can get that later in more detail. I just want to help people understand hardening and tempering so they can ask the right questions and then understand the answers they get back.
Let’s pretend that steel has a hardness range from 0 to 100.
0 is the softest steel can be while in a solid state.
100 is the absolute hardest steel can get.
So the 0-100 range is where we have to work our knife steel, completely soft to completely hard.
Well, we know that 0 is too soft for a knife because soft steel bends easily and can get scratched up easy also.
100 would be too hard for a knife because hard steel is brittle. If you bend it just a little bit it breaks right off like an icicle.
Our dilemma in knife making is to get a piece of steel that is hard, but not too hard.
First we have to learn how to make steel hard. To do that, we take a piece of soft steel and get it hot. We get it hot enough to change the properties of the steel. This temperature is different for each steel but we will just say that we have to get it real hot.
So we heat the steel up real hot, the steel changes it’s properties (carbon steels loose their attraction to a magnet).
Now it is really hot so it is also really soft. Then we take that hot steel and stick it into some oil that is cold (about 125 degrees but cold compared to the steel). The steel is shocked by the sudden cold and cools off very quickly. When it cools off this fast the properties al change again. The steel gets really hard.
The steel does not get to 100 but maybe to 90. Using different things to quench in result can result in different hardnesses after quenching. Quenching in Brine can get the steel to or very close to 100 in hardness.
The process that we just did is to harden the steel. Some refer to it as heat treating it but for our discussion it is hardening. This is a very stressful thing to the steel, the properties of the steel are shocked severely and sometime the steel will crack.
OK, so here we are with a piece of steel that is 80 in hardness. Too hard for a blade because it is still kind of brittle and can break. We are going to have to do something to soften it up.
The way to soften it up is to heat it up again. But we don’t want it really soft so we won’t heat it really hot. Just a little, to soften it up just a little. Soft enough that it will bend if forced to do so but won’t break. If you were lost in the woods, you would probably rather try to survive with a bent knife than a broken knife, right?
OK, so we need to figure out how soft we want the knife. People like butchers and hunters know how to sharpen their knives and don’t mind doing so. Therefore they want knives a little softer than a guy that can’t sharpen his knife worth beans. That guy needs a harder blade so it stays sharp longer. We would need to make his blade a little harder.
If we take that hard blade and heat it up to 400°, it would get softer, maybe down to 60 or 61.
If we heat it to 425° it will get a little softer, maybe 58 or 59.
If we go to 450° it will soften up to maybe 56 or 57.
This “softening” of hard steel is called tempering. Most knife makers temper to a hardness between 56-61 for almost everything they make. Softer and the knife will bend, harder and it will break.
You harden a knife and then temper it to the desired hardness depending on the knife’s proposed use. These two processes together are called “heat treating.”
If you grind out a knife, then heat treat it and then start regrinding the knife to clean it up and get it to final polish. You have to be careful not to heat it above the temperature you tempered your blade at or your blade will get softer than you want it to. You would then have to repeat the entire heat treating process to get the hardness you want.
There are rules to follow depending on the steel you are using and how you do all of this, but hopefully the idea of why we make it hard then soften it back up makes sense.
There you go a VERY GENERIC definition of hardening and tempering. This was prompted by the many questions I get and then the repeat questions due to new people not understanding the difference between hardening and tempering. After this explanation, most get the general idea and can then start asking more in depth questions related to their steel of choice.
What is a temper line?
A temper line, also known as a hamon line, is a line on the knife blade that is created by differential heat treating the steel. When you differentially heat treat the steel you harden only the edge of the steel as opposed to hardening the entire knife. After hardening the edge only and then tempering the edge, there is a point between the hard steel and the softer steel that shows the transition between the two. This line can be seen if desired by placing the blade in an acid solution for a few seconds. The acid attacks the steel and begins to eat the steel away. Since the metal is both hard and soft it attacks it at different rates. After just a few seconds in the acid, the blade is removed and lightly sanded. The result is a very nice looking blade with a very obvious line showing the transition between the hard and soft steels. There is a knife maker that I think has perfect this technique better than any other. This knife maker is a full time maker and his knives are very high quality. Terry Primos is the maker and his web site is www.primosknives.com.
What does it mean to normalize?
Normalizing is for relieving stress in the steel. There are different methods to do this and different knife makers have different opinions on the effectiveness of the different methods. One method is to heat the steel past critical temperature and then remove it from the heat and let it cool to black color. Put it back in the fire and repeat for three times.
What is annealing?
To anneal the steel means to make it soft. To anneal a piece of steel, you heat it up past its critical temperature and then let it cool as slowly as possible. Many people put the steel in vermiculite because of its insulating properties and let it cool overnight. The steel is soft for drilling, filing or grinding.
What are the components of different steels?
I don’t even need to try to answer this. There is another fellow knife maker named Terry Primos that has a great breakdown of this on his web page at www.primosknives.com so I will just provide this link to the information http://wwwprimosknives.com/articles/steelcls.htm
Quenchant? Oil, water, or air?
If you refer to the page of Terry Primos above he has information on steels. There is a chart explaining how to tell what each steel needs for quenching by looking at the letters in the steel name. O1 has an O so it uses oil, W1 uses water…
What types of handle construction are there?
There are two main methods for attaching handle material.
On full tang knives, the handle is attached by putting pieces of the chosen handle material on each side of the tang and securing them to the side with pins or rivets and epoxy.
On hidden tang knives, the tang is made small and passes through he handle material. The tang can be a short tang, medium tang, or completely pass through the handle.
What glue should I use?
Epoxy. Two part epoxy is the best in my opinion. Use the two part, two ton epoxy that cures slowly. I use 24 hour curing epoxy. For some reason the longer it takes to set the better it sets. After your epoxy sets and you start shaping the handle, be sure not to let things get too hot. The epoxy will release if it gets hot.
Can I color the epoxy?
Yes. The epoxy can be colored by adding a drop of oil based paint. As long as it is oil based it will not interfere with the properties of the epoxy. I have colored the epoxy in mosaic pins by adding colored chalk to it. As long as your color additive is not water based, it will be fine.
What are mosaic pins?
Mosaic pins are pins with a pattern created in them. They are made by taking a tube and putting pins through it to create a design. Different sized pins in different configurations make the patterns quite interesting. The entire tube is filled with epoxy and allowed to set. The tube is then cut into pin length pieces. Many knife makers create their design in the tube and then use a vacuum pump to suck epoxy us through the tube, filling it completely.
What steel/metal for bolsters and pins?
Brass, copper, stainless steels, Damascus, mokume gane as well as others. Some bolsters and guards are made of non-metal materials.
What machines?
If I were to suggest tools to a beginner by my preference as to what to get first and then what to get next. My list would be the following:
First set of tools-
Safety glasses
Respirator
Small drill press
8” grinder (remove grinding stones and put buffing wheels on it)
Files of all sizes and shapes. You can’t have too many files. Use golf balls for the handles; see the shop tips section of my site.
A solid vise
Some method of marking your knives with your name. A stamp, electro-etch or even a vibrating tool.
Sandpaper of all grits down to about 1500 to 2000
This will get you through the creation of knives by filing the knife to shape.
Second set of tools-
OK, here is where you need to decide how serious you will be. If you plan on making knives for a long time (not just 10 or 12 and give it up).
A good band saw is $500-$1000
A belt grinder is $1500 approximately
A forge is cheap but a lot of work to make (mine was about $50), or expensive if bought
An anvil is about $1.50 to $3.00 per pound and you will want at least 100lb
For the REAL SERIOUS-
Hydraulic press, speed up making Damascus
Surface grinder, gets stuff flat
Anodizer coloring titanium
Heat treat oven, or use your forge if you have one, some have both
Tempering oven (use the one in the house)
Cryogenic treatment station, part of the heat treating process
Acid etching station, for etching Damascus
Gold plating station, if you want to get fancy
Bluing station, if you think you would want to blue your stuff
Mini metal lathe, for making parts
Milling machine, to do the stuff I can’t do
Electro etching station, for putting on your mark
Photo transfer station, to make your own stencils
How do I keep the drill bit from wandering around?
Without a doubt, every time you drill a hole, use a center punch.
What angle should the blade bevel be?
This depends on many factors and opinions. The “average” is probably around 25° to 28°.
How do you do the brass rod test?
The brass rod test is performed to test the knife. The blade edge is held at an angle and placed on a brass rod. The blade is then pressed down on the rod until the blade bends around the rod. The blade is then moved forward and backward, rolling the brass rod against the table top. The cutting edge should flex over the brass rod for the entire length of the blade. After the test, the edge is inspected. If the edge is deformed, it means the blade is too soft and bent when moved over the rod. The knife needs to be redone starting with the heat treatment. If the blade has hairline cracks in it, your blade edge is too hard and broke as it passed over the rod. The knife has to be remade. Ideally the knife has no change at all. Here is a picture I took of the brass rod test. The brass rod is not brass in this case, I wanted contrast so I used a ceramic rod (not recommended). You can see the blade flexed in this picture.
Where can I buy books?
Most knife supply places sell books on many knife making topics.
Where can I buy videos?
Most knife supply places sell videos on many knife making topics. I also would highly recommend a video by Gene Osborn called “How to Make a Hunter.” This video can be purchased from Gene at www.centercross.com it is inexpensive and is over three hours long and packed full of information.
Where can I get a stamp?
Here are two places that I know of
Harper Manufacturing, 800-776-8407
How big should the stamp be?
You should get a stamp that will fit on the smallest knife you plan on making. If you only plan on making large blades, a 1/8” is about the largest I would recommend.
What is electro-etching?
Using electrical current to remove metal. You use a stencil to identify where the steel will be removed.
What is better, stamping or electro-etch?
Depends on who you are asking. Many makers swear by stamps and others like etching, some even engrave their names. Some people think that stamping creates a weak place on the blade. I have never heard of a blade breaking at a logo mark so I wouldn’t worry about it if the blade is correctly heat treated. Electro-etching does not create any stress on the blade as far as I know. Both logos could be ground off but the stamp could be recovered if it were absolutely necessary. When a logo is stamped into a blade it makes the metal below the letters more compact and harder. If the logo were to be ground or sanded off it could be “raised” by putting weak acid on it. The acid would attack the dense steel at a different rate than the rest of the steel. The acid would eat away the rest of the steel and the logo would be “raised” to a point that it could be seen. This is how police “raise” the serial numbers on stolen guns that had the serial number ground off. Not really a factor for knives but an interesting thing to know.
Where can I get a logo made for electro-etching?
There are many places that can make your logo.
ElectroChem-Etch
545 A West Lambert Road
Brea, CA 92821
714-671-7744
IMG-Electromark
PO Box 379
Utica, NY 13503
800-775-3824
http://www.img-electromark.com
Contact: Patricia Bruno
Lectroetch Co.
5342 Evergreen Parkway
Sheffield Village, OH 44054
440-934-1293
Contact: Dave in sales
Marking Methods, Inc.
301 South Raymond Ave.
Alhambra, CA 91803
626-282-8823
Contact: Customer Service
Martronics Corp.
PO Box 200
Salkum, WA 98582
800-775-0797
http://www.martronics-corporation.com
Contact: Shirley
Monode Marking Products, Inc.
7620 Tyler Blvd.
Mentor, OH 44060
440-975-8802
Contact: Karen Wagner, Sales Manager
TUS Technologies
537 State Road
N. Dartmouth, MA 02747
508-997-3200
Contact: Juergen Hallemeier
What etchant?
Call the company that you got your logo from and tell them your steel type; they will recommend an etching solution specially formulated for your steel.
Where does the logo go?
Anywhere you want to put it. Basically there is no dedicated place; however there are places that are traditional places for marking your knives. The blade is a popular place and is usually marked on one side. The side that is marked is usually the side you see if you hold the knife in your right hand and point the blade tip to your left. Another place to mark the knife is on the same side of the knife but right in front of the guard or bolster.
What is stabilizing for handles?
Stabilizing is the process of taking a piece of handle material and removing all of the air and water in it, then filling these voids with resin. It is a fairly complex process but can be done in a personal shop. You can also have your handle material stabilized by various companies or you can just purchase their pre-stabilized material.Is there a school for learning knife making?
Yes. The Bill Moran School of Bladesmithing in Old Washington, Arkansas, and Texarkana College.
Will a knife maker close to me give me classes?
Possibly. Just contact a maker you would like to train you and ask. Many are willing to train new people. Pricing will vary.
Where can I sell my knives?
Most beginning knife makers begin selling their knives to family, friends and people they interact with daily. Search out your hunting and camping friends. Word will spread if you are making good knives.
How much should I charge?
This is a difficult question to answer. You cannot charge by time and expense and come up with a decent price. You also cannot charge by the hour or you will go broke. Most knife makers complete a knife and just look at it and ask themselves, “What is it worth to me?” That becomes their price. As you get better, your prices can raise but you need to be realistic. You may be able to make a better knife than Bob Loveless but you can’t get the same price as Bob Loveless. The reason is the history of Loveless and the lack of history you have.
Sell knives on E-bay?
Some makers sell their knives on e-bay. Remember people bidding at an auction are looking for a good deal so you may not get the prices your work deserves. Be ready to get your feelings hurt when someone will not bid higher than $20 for a knife you value at $400 dollars.
Can I get a patent on my knife design?
Sure, if it is a unique design. You would apply for a design patent that would protect the design of your knife. Someone could make a minor change to your design and would not violate your patent. A design patent protects your design only if someone copies your EXACT design.
Can I get a patent on my tool design?
Sure, if it is a unique design. Then you have to decide if you want to patent the design or the use. If you want to patent the design you would do it like you would for a knife. If you want to patent your tools use (utility), you would need to apply for a utility patent. This type of patent is more difficult to get. You have to show that your tools utility is new and useful and has not already been invented. You also need to show that there was an inventive step in the creation of the tool. Utility patents can be difficult to obtain and can also be quite expensive. I have three utility patents for tools that I created for companies that I have worked for and they take about three years to get through the patent office to be granted. These are difficult to obtain but you may want to give it a try if you believe in your invention. There are two books that I recommend if you are interested in patenting your tool or knife. “The Inventors Desktop Companion” by Levy and “Patent It Yourself” by Pressman.
Do I have to join a guild or association to be a knife maker?
No. Many very well known and successful knife makers do not belong to any organizations.
Why would I want to join a guild or association?
Some collectors will not buy knives from anyone other than members of these organizations. Some people can get higher prices for their knives after joining some organizations.
Will it hurt me not to join?
Hard to say because you don’t know for sure it would benefit you if you did join.
Can I be a journeyman or master smith if I don’t join?
Not one that would be recognized by these organizations. Organizations have been formed and testing has been determined as a method for a knife maker to prove his skills to others. After proving these skills, the person is awarded a status of skill by that organization. There are many knife makers that do not belong to any organization and therefore have not been awarded a status by them. There are makers that don’t belong to organizations that are better than those that have been awarded status by organizations. If you consider yourself a “master smith” and say so, you may get challenged by people to prove you have been awarded that status by an organization. I personally do not have a skill level rating from any organization. A good friend of mine passed away and he had my very first knife and also the very latest knife I made before he died. His brother took these knives and mounted them into a frame and put a label on it stating they were made by “master” knife maker Bob Warner. He bestowed the title on me. Will it be honored by organizations? Probably not. Does he believe it? Absolutely.
What forums are there?
There are many and a simple search on the internet will find several of them. The only one I personally spend a lot of time at is the Custom Knife Directory located at www.ckdforums.com. I am a moderator there and frequent it because I believe it to be the most professionally run forum on the internet. This forum is there to exchange ideas and to assist other knife makers by providing a place to ask questions and discuss all areas of knife making. It is run with respect and candidness. There is a lot to learn here and by reading the prior posts, almost anything you want to know can be found here. If not, just as your question and someone will try to help. There is a tutorial section that can be accessed by clicking on the “HOW TO” link at the top right of the screen. There are step by step instructions on how to do many knife making tasks as well as other information. It is well worth your time if you want to make knives to join this forum. Please look through the old posts and search a lot before asking a question. As you read, you will see that the same question and the same answers have been repeated numerous times.
20. Etching Damascus by Gene Osborn
Etching damascus is as much art as it is science, but there are a few things that are "must dos".
Prior to etching, the blade needs to be COMPLETELY FINISHED. After going to 600 grit on the grinder, I then go over the entire blade by hand with 600 grit. You must be 100% certain that you have ALL the scratches removed, etching will magnify any scratches you missed.
The most common etching solution is Ferric Chloride (archer etchant from Radio Shack) diluted 3 parts distilled water to one part archer etchant. Put your etchant in some kind of container where the blade can be hung in the etchant with a wire....you do not want the blade laying on the bottom or touching the sides.
Prepping to etch, the first thing I do is put on a pair of latex gloves. This is to protect the blade from any hand/body oils. I first clean the blade well with acetone, and then clean it again with windex, wetting it down with the windex, cleaning it well, then drying off the windex completely. THE BLADE MUST BE 100% CLEAN, WITH NO RESIDUE OF ANY KIND.
Lower the entire blade into the etchant and give it a slow count to 10, then pull it out and check it there are any shiny spots or runs on the blade....if so, that indicated that you did not get the blade clean, or perhaps you missed some spots.
How long to etch is purely a matter of personal taste. I usually etch until I can feel topography when I rub my index finger over the flats of the blade. That generally takes about 10-20 mins depending on the alloys in the damascus.Once etching it done, you need to neutralize the etchant. The blade will come out of the etchant with "black sludge" all over it, that is just a by product of the etchant working on the steel. Neutralize the etchant with either TSP (cleaning solution you can purchase at most hardware stores), Baking soda/water mix, or even by soaking it down with windex. Personally I think TSP does the best job.
I then go to the swarf bucket under my grinder, which is full of soapy water, and using #0000 steel wool, scrub all the sludge off the blade. Afterward I dry the blade, and then oil or wax it.
Once you've etched the blade you can LIGHTLY go over it with 1200 or 2000 grit sandpaper on a hard sanding stick. This will "highlight" the pattern by shining up the high areas of the topography, while no touching the lower areas.
Concerning buffing....you CAN do it, but it will generally remove any darkness within the pattern, and in some cases if the etch is shallow, will make the pattern appear "smeared".
Once all that is complete, the blade is finished, and is not touched again with anything other than wax. Working with damascus requires a different approach to completing a knife.....the blade must be completed and etched prior to putting on a guard or handle.....then you have to constantly keep in mind that if you ding any part of the blade with a belt, sandpaper, or anything else abrasive, you've pretty much wrecked it.
21. How to Build a Post Vise Stand by Bob Warner
Purpose of this Equipment
The post vise is a piece of equipment that every blacksmith shop can benefit greatly from. This vise is made for taking abuse and I have abused mine without damaging it. I use this vise for holding hot steel while I am twisting it to make Damascus, or pounding on it to bend steel. The stand needs to be sturdy so that it does not tip over or move around while you are working. The vise is designed to be permanently mounted on a post with the foot on the ground. This way the energy from hitting the vise is transferred to the leg and then to the ground. I wanted to mount my post vise solidly but still be able to move it if I wanted too. The description below is how I accomplished this. I am very happy with the finished product.
Materials
30 gallon drum
Thick walled pipe
8” channel iron 18” long
One bag of redi-mix concrete
Bag of sand
3” piece of 1” PVC pipe
Construction
Take the 30 gallon drum and cut it off at the bottom ring. I cut mine just about ½” above the ring. Cut the rolled over edge off of the top of the drum. I cut mine about 1” below the rolled edge. Cut about ½” out of the top rind and put it in place on top of the cut part of the drum bottom. This creates a new rolled edge on your short drum. Pop rivet it in place. Put your pole in the drum and determine the working height of your vise. The height should be at whatever level you feel comfortable. Remember you will use this for a lot of things so get it in a comfortable work zone. Cut your pipe off at the height you want it. Cut a 6” piece of 1” diameter PVC pipe. Check to be sure the end of your post vise will fit INSIDE of this pipe. Get a larger pipe if necessary to ensure the post vise led will fit inside it. Take the redi-mix concrete and mix it up as directed by the manufacturer (don’t add the sand). Pour the redi-mix concrete into the bottom of the drum; add your pipe into the drum and into the concrete. Be sure to offset the pipe a little so that the weight of the channel will be centered over the drum after it is installed. Take the piece of PVC and place it next to the pipe. Get your post vise and try to fit it to be sure everything is correct. Remove the post vise and let the concrete set. After the concrete sets, weld the 8” channel on top and then mount your vise.
The last thing you do is to pour the entire bad of sand on top of the concrete. This is a work saving effort because there will be times you drop things and if it lands on sand instead of concrete, there is less likeliness that your blade will be bent.
22. Useful Links by Bob Warner
Links are an interesting thing; you will see sites with many, many links. My site does not have that many links but those that are here I believe are of value to those people that are looking for more information or a good place to purchase products. I don’t do banners and flashy stuff, just simple links that will get you where you want to go. Check these sites out and you will most likely visit them more times in the future.
The Custom Knife Directory
Texas Knife makers and Collectors Association
North Texas Blacksmiths Association
Center Cross Metal Works
Don Fogg Custom Knives
Primos Knives
Crawford Knives
Cowles Knives
Mongoforge
Fox Creek Forge
Wild Rose Trading Post
Online Knife Show
Beaumont Metal Works
Abrasive Products by American Buff International
Custom Knives
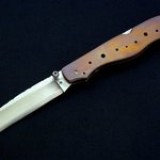
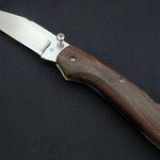
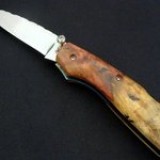
Instructional Videos
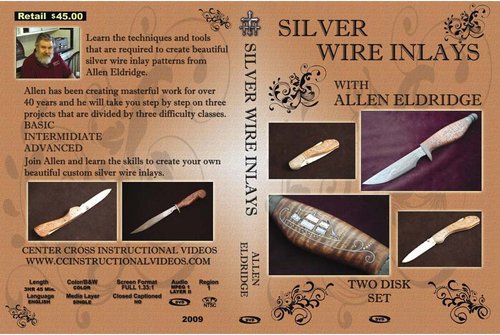
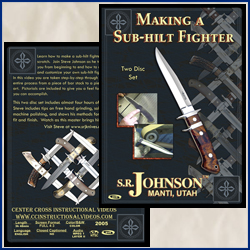

Ultimate Knife Kit